I used to take screenshots when I was a noob. Now, just like all the evolved iPhone users, I take screen recordings now. But do you know how to screen record on iPhone? Is it very tough? Well, iPhones come with built-in screen recorders. And, using the screen recording feature is as easy as it can get. And, it has got nothing to do with Apple Subscription.
iPhones with iOS 11 and beyond have this screen recording feature. So, why take screenshots when you have a device that lets you screen record with audio without having to download a third-party application? Screen recordings can help you in ways that you cannot even imagine. Now please imagine and appreciate this post for enlightening you.
I will show you how to screen record on iPhone, but before that let me tell you that the screen record button will show in the Control Center once you follow my instructions. Once it shows, you can access it from the home page of your iPhone itself. Without any more delay, let me take you through the processes.
In This Article
How to Screen Record on iPhone?
Before using the screen recording function on your iPhone, first, let’s bring the screen record button to the Control Center if it is not there. You can still use it without adding it to the Control Center, but if you have it there, it will be easier for you, and you can access the screen recording feature faster. Let’s add the screen recording button to the Control Center and then learn how to screen record on iPhone.

- Swipe down from the top-right corner or swipe up to open your iPhone’s Control Center.
- If you find a button (a dot with a circle around it), then move on to the next section. If you don’t, proceed to the next step.
- Go to Settings > Control Center > Customize Controls.
- Now, find the More Controls menu, and from there, find the Screen Recording option.
- Hit the ” + ” (green-colored symbol) to jump to the Included Controls menu.
- Whenever you want to remove the screen recording button from Control Center, you can do so by returning here and tapping the ” – ” (red-colored symbol).
If you have added the screen recording button to the Control Center of your iPhone, let’s move on to how to screen record on iPhone. The iPhone screen-recording feature will let you record every swipe, tap, or anything that the screen is displaying as long as the feature is running. This is one of the many iPhone tricks that never fail to amaze you and make your life easier.
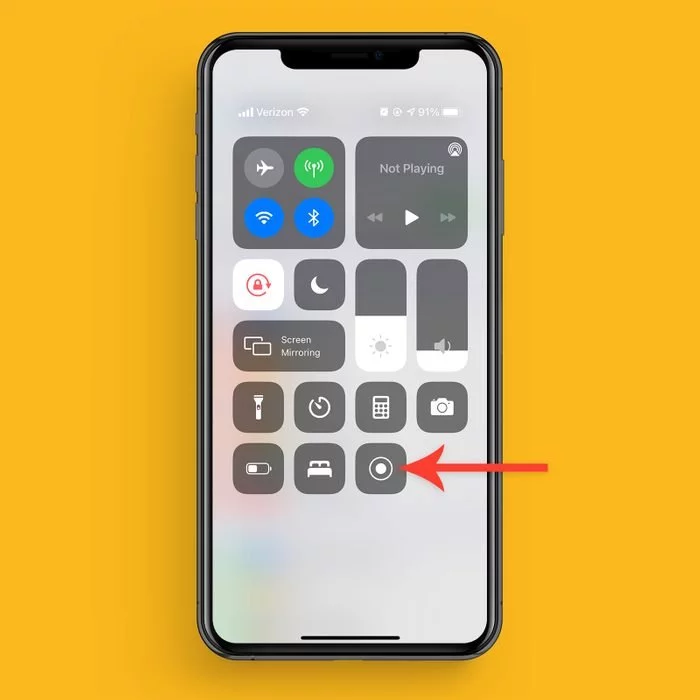
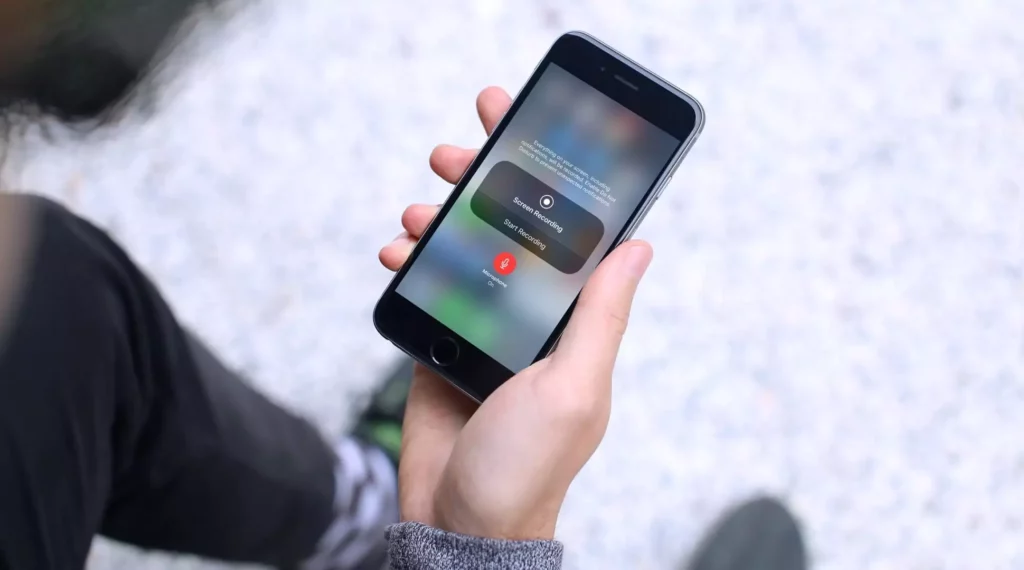
- Swipe down or up depending on the generation of iPhone you are using to access the Control Center.
- Hit the screen recording button.
- After a three-second countdown, the clock on the phone will turn red. In the case of older iPhones, a red bar will appear.
- Tap outside the Control Center pop-up to close the Control Center.
- To stop the recording, tap on the clock or the red bar. Alternatively, open Control Center and tap on the Screen Recording button again.
How to Screen Record on iPhone With Audio Recording on?
To screen record on iPhone with audio on, do these:
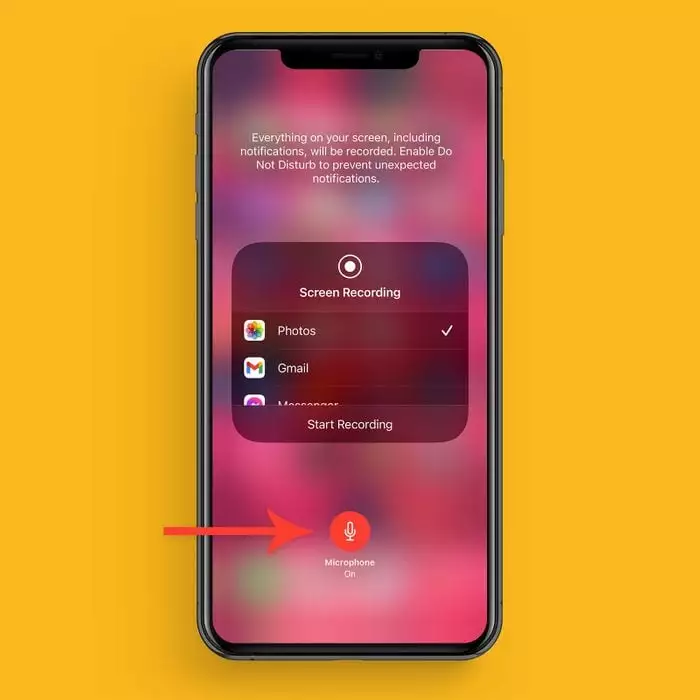
- Tap and hold the record button from the Control Center.
- You will find a microphone button at the bottom of the new pop-up, Hit that.
- Close the Control Center.
- After this, anytime you turn on screen recording, your iPhone will also record audio along with it. You can turn the microphone off by coming back here and tapping it off.
How to Edit Your Screen Recording?
How to screen record on iPhone is clear. But how to edit a screen recording? With the steps below, you will be able to edit any screen recording using the iPhone’s default editing tools and filters.
- Go to the Photos app.
- Open the Camera Roll album and open the video you want to edit from there.
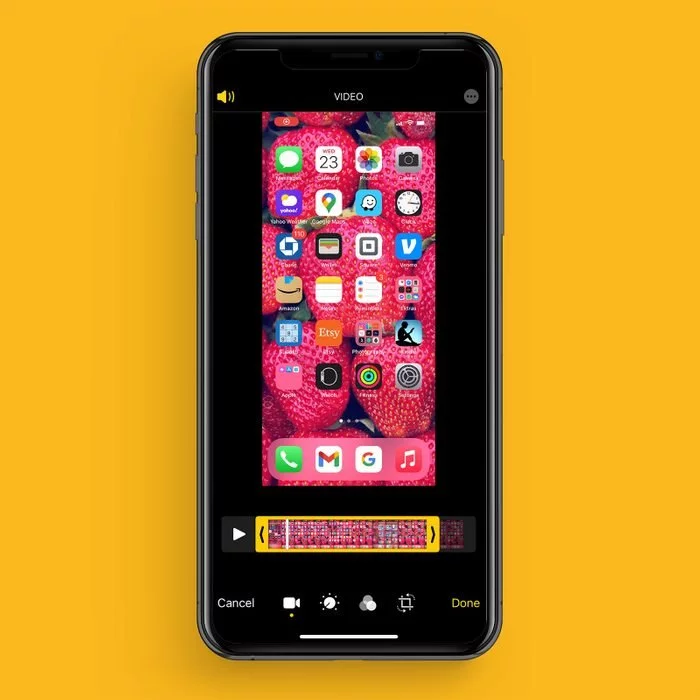
- At the top of the screen on the right-hand side, tap on Edit.
- The editor has now opened. There is a timeline of the video at the bottom of the screen, you can trim the video from the beginning or end using that.
- You can press the Play button and check if you need to make any more adjustments. You can make as many adjustments as you want.
- You can also change the filters the same way you would for any other photo or video.
- Once done, tap on Done and then Save as a New Clip.
To learn how to screen record on iPhone, go to the section right above “How to Edit Your Screen Recording?” You can visit iPhone User Guide for more instructions on anything iPhone.
How to Screen Record & Enable Audio Microphone?
Wrapping Up
So now you know how to screen record on iPhone. This feature is extremely helpful when you want to send a process to someone or when you want to record a video that you found online but cannot download it. And iPhone enables you to record your screen without having to download any third-party app. Isn’t that thoughtful of Apple? Until next time, Ciao!
Frequently Asked Questions
How long can you screen record on iPhone?
There is no limit to screen recording on iPhone. You can record until your storage burns out.
How to Screen Record on iPhone 14
To screen record on iPhone 14, first, open Control Center. Then, tap on the screen recording button and wait for the three-second countdown. The recording should be on now. To stop the recording, tap on the red status bar at the top of the screen and then hit Stop.
Why can’t I screen record on my iPhone iOS 14?
Check if you have turned on Parental Control restrictions. To turn off Parental Control restrictions, go to Settings > Screen Time > Content & Privacy Restrictions > Content Restrictions > Tap on Screen Recording, then tap on Allow.