
Discord is the new trend in the gaming sector today. To communicate smoothly, make voice calls, video calls, and undertake endless chatting, Discord is the easiest way to do so. However, continuous text messages become a total headache sometimes. Further are the hassle-free and convenient ways to make a Discord Channel Read Only. Go along, and you can surely binge on Netflix later on.
On the good side, having deeper and more intense discussions is a prominent feature on Discord, indeed. It allows the users to make a smart move in their game while sharing their strategic thoughts. Nevertheless, anything excessive in this world is a problem in itself. Chill it out and move ahead to set up an easy read-only channel on Discord.
You can also assign a specific role to the admins in your read-only channel. Below, you will find everything in reference to making a Discord channel read only and permitting the admins to send messages in the read-only channel on Discord. Have a look!
In This Article
Make a Discord Channel Read Only on Desktop/Website
Following are the steps to make a Discord Channel ‘Read Only’ on Desktop or Website. Look out through the same and do treat me with a Coffee afterwards.
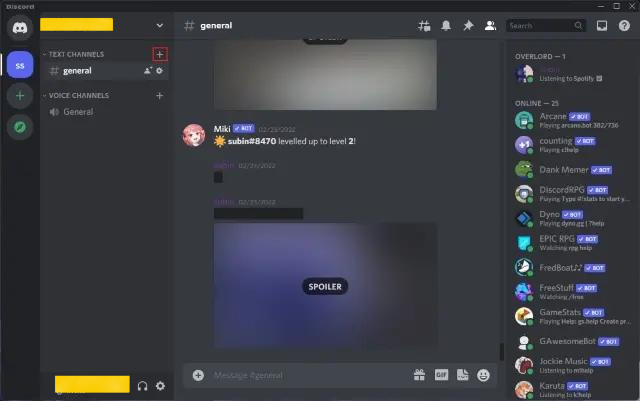
1. Open ‘Discord’.
2. Click on the ‘+’ icon beside the Text Channels section. This will create your newly fresh text channel.
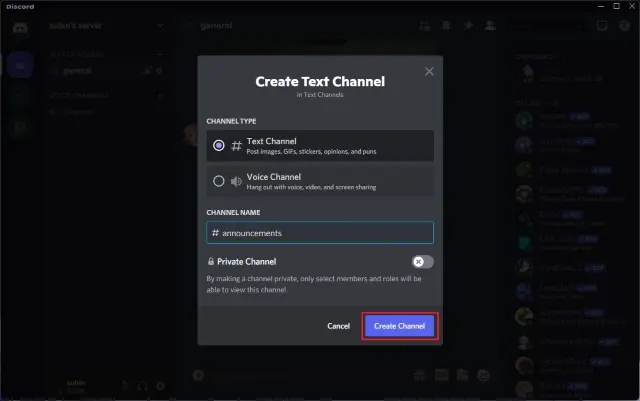
3. Fill in your name for the channel > Click ‘Create Channel’.
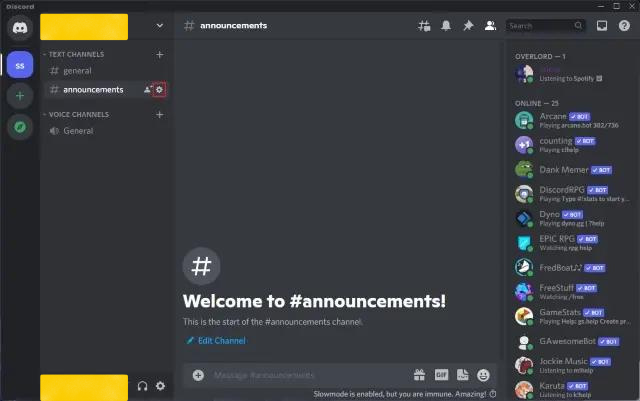
4. As you will head to your new channel, head to ‘Settings’ and scroll down to disable permissions for ‘Send Messages’ and ‘Create Private Threads’.
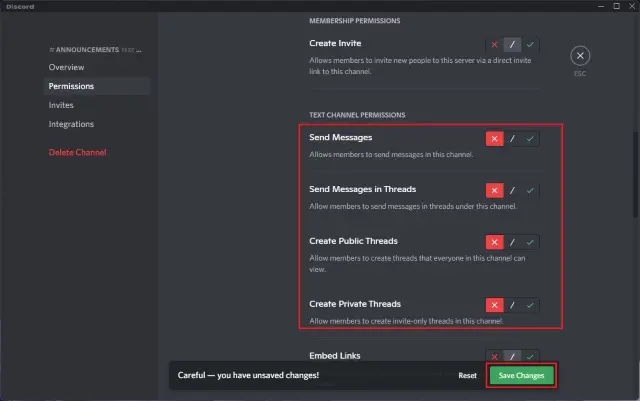
5. Tap on Save Changes.
After following the above steps, you are done with your task. You have finally created a read only Discord channel. This will not allow the Discord server members to spam you with their messages. However, if you will change your mind, you can surely permit the server moderators to send messages to your read-only channel. Check out the following section to know how to do so.
Permitting Server Moderators/ Admin to Send Messages in Read Only Channels on Discord (Desktop/Website)
To allow the server moderators or admins to spam you with messages in your read-only discord channels, you have to form a new role for admins. In case you already own a server of admin roles set up, feel free to skip to the 7th step.
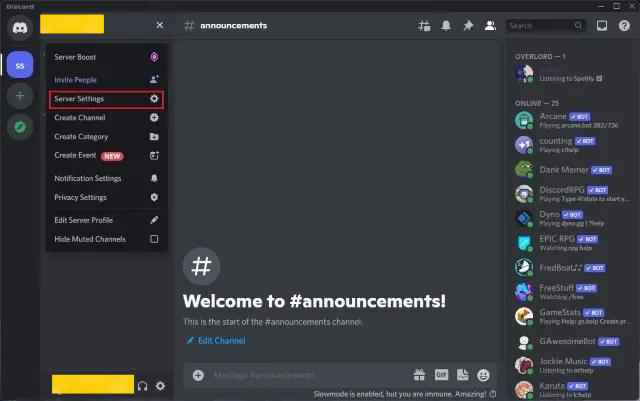
1. Open Discord > Click on the name paced at your top left corner > Tap ‘Server Settings’ from the list.
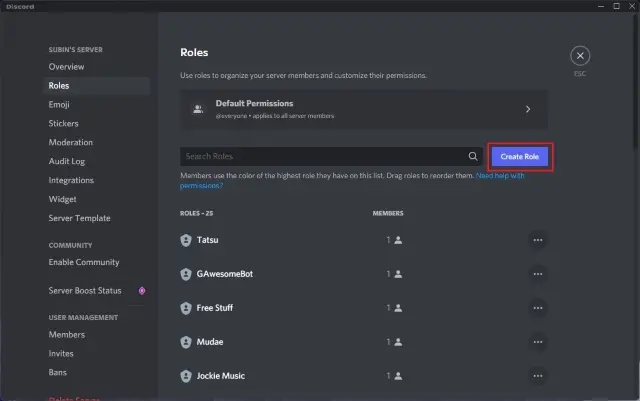
2. As you head on to the page of server settings, move to the ‘Roles’ and tap ‘Create Role’.
3. Name your role and color it as per you like.
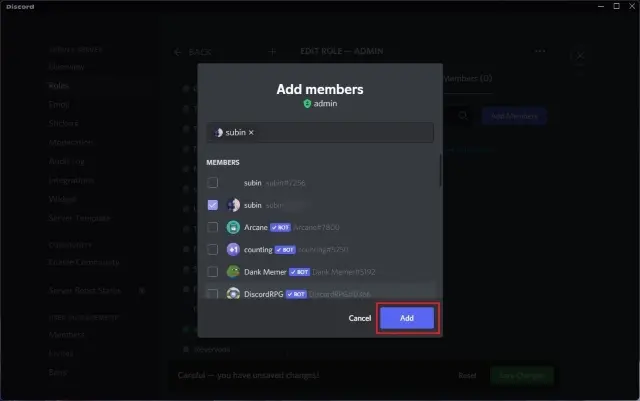
4. As you are done with your name and color of the role, head on to the ‘Manage Members’ tap. Click ‘Add Members’.

5. Choose your Members and tap ‘Add’ to assign them with their administrator role.
6. Tap Save Changes.
7. From there, press Settings > ‘+’ next to the Roles/Members.
8. From there, pick your Admin.
9. Further, move on further to the section of ‘Text Channel Permissions,’ and from there, you can enable: Send Messages in Threads, Create Public Threads, & Create Private Threads.
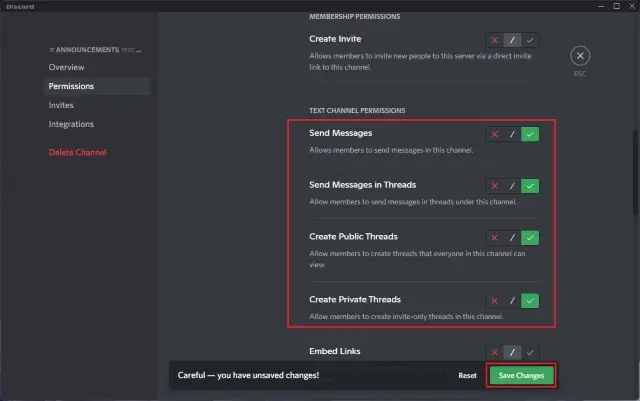
10. Tap Save Changes.
Here you go; this allows the admin to send messages in the read-only discord channels.
Make a Discord Channel Read Only on Android/iOS
To set up your discord channel read only on Android/IOS, go through the steps mentioned below:
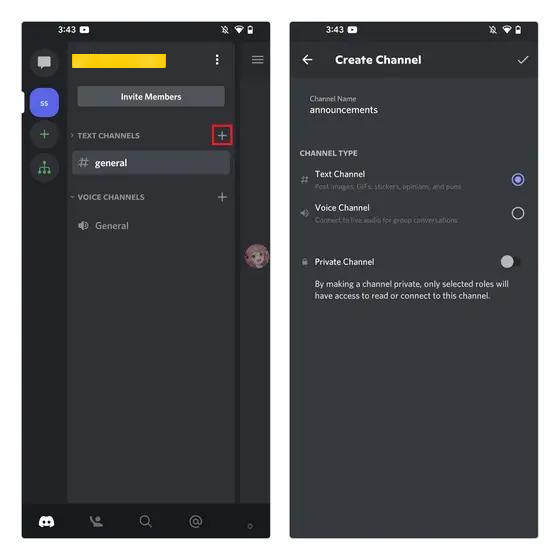
1. Open Discord > Click ‘+’ next to the Text Channels.
2. Fill in your space for Name of the Channel, and click the checkmark placed on the top-right corner of the screen.
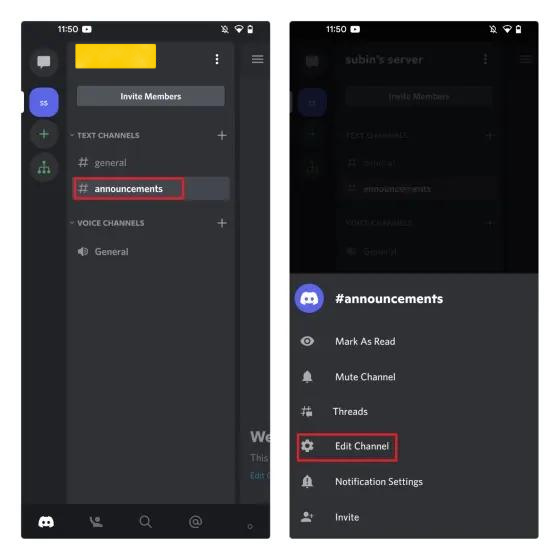
3. Give a long press to your channel name and tap on the ‘Edit Channel’ to switch to the settings of the channel.
4. Click ‘Permissions’ underneath the ‘User Management’ and click on ‘Everyone’.
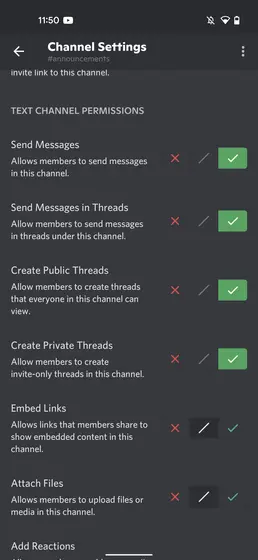
5. Further, scroll down to the section of ‘Text Channel Permissions’ and disable ‘Send Messages, Send Messages in Threads, and Create Private Threads’.
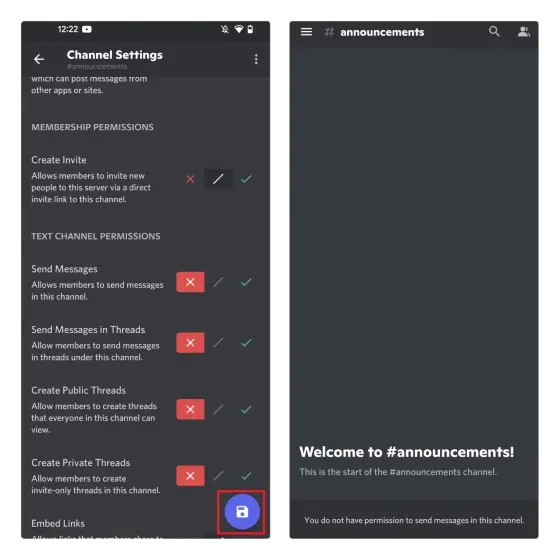
6. Click Save.
Permitting Server Moderators/ Admin to Send Messages in Read Only Channels on Discord (Android/iOS)
Below written are the steps to allow the server moderators or admin to send messages in the Discord read only channels. Read out loud:
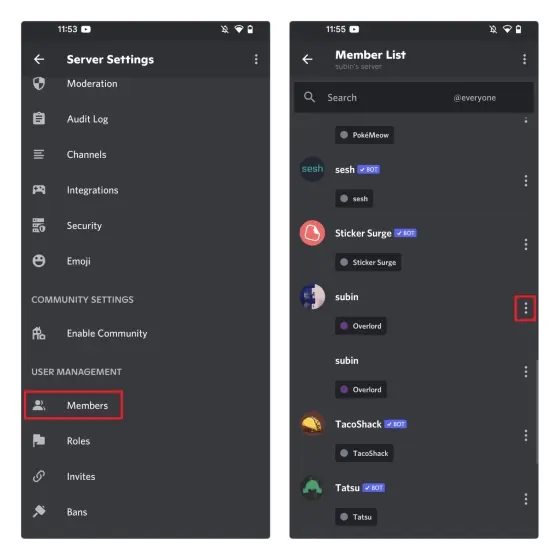
1. Head to your Server’s name and tap ‘Settings’.
2. Click ‘Roles’ > ‘+’ at the bottom right corner of the screen.
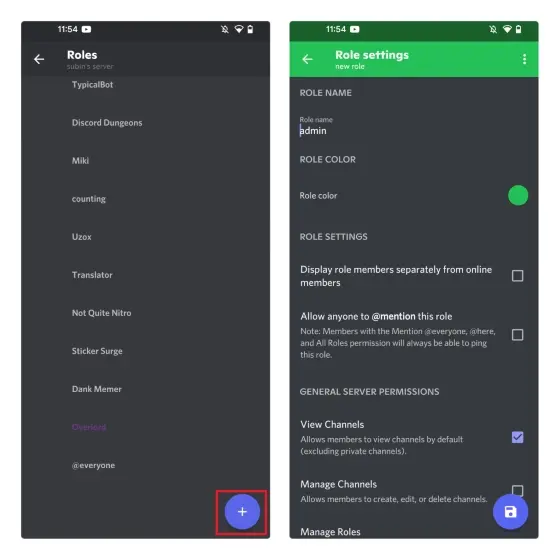
3. As you move ahead, Name the role and pick a color as per you desire.
4. Click Save.
5. Head back to the server settings page and press ‘Members’. Choose the members of your choice to whom you will assign the admin rights.
6. Click on the three dots beside the username of your admin. Tap the checkbox placed next to the admin role to assign the admin role to the user.
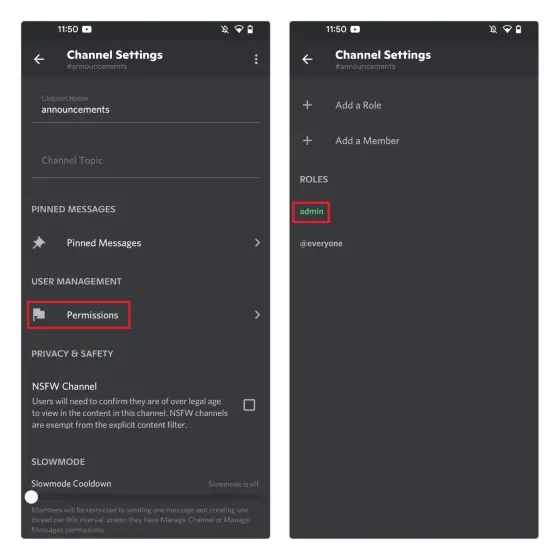
7. Long press the new text channel > click Edit Channel.
8. Click ‘Permissions’ below the User Management and opt your ‘admin’ as the role.
9. Last but not the least, enable the ‘Send messages, Send messages in Threads, Create public threads, and Create private threads’ under the Text Channel permissions and click Save.
Wrapping Up
Now, you can finally have a peaceful time on Discord with no continuous notifications. Obviously, setting up a new Discord read only channel is a good option to choose. Form your one, and do let us know how great Path of EX is to come with this idiot-proof method. Some compliments do cherish us all day long :p
Also, you must also drop your experiences, suggestions, and confusions in the comment section below. We will get back to you as soon as possible.
See You Soon, Pals!