
Many of you might be thinking about why we are searching for stopping the auto-updates on the desktop. Are not just updates vital for maintaining your system’s up-to-date and functional and providing renewed Windows features and developments? Understandably, the answer is yes. However, the automatic updates in Windows 10 can hurdle your ongoing work as they urge you to restart your computer and install them instantly. It gives you no time to think about what you are going to install on your system. To help you out, here I am going to tell you how to stop auto update in Windows 10.
Although updates are important for your phone as well as the desktop to make your system run smoothly. However, the timing of the automatic updates on Windows 10 is unpredictable. It may appear on your system while you are working on an important task. Thus, it leaves you frustrated about where to stop it. Let me tell you that automatic updates can be delayed for 35 days, and you can update them at the right time.
If you want to know more about how to stop auto update in Windows 10, quickly read the article and find the solutions right here. After finishing this article, you can easily delay your automatic updates on your system.
In This Article
How to Stop Auto Update in Windows 10?
Windows 10 updates are automated, as is the case with modern technology. This is because designers genuinely care about the program they create, and they don’t trust end-users to update their own. As a result, automatic updates have been developed to get your work done easily and maintain the proper operation of your system.
However, the drawback of automatic updates is the timing, and there is no guarantee at what time it will occur. This article will lead you through all the possible solutions for stopping an update and restoring it at the right time. To know more about it, follow the steps and learn how to stop auto update in Windows 10.
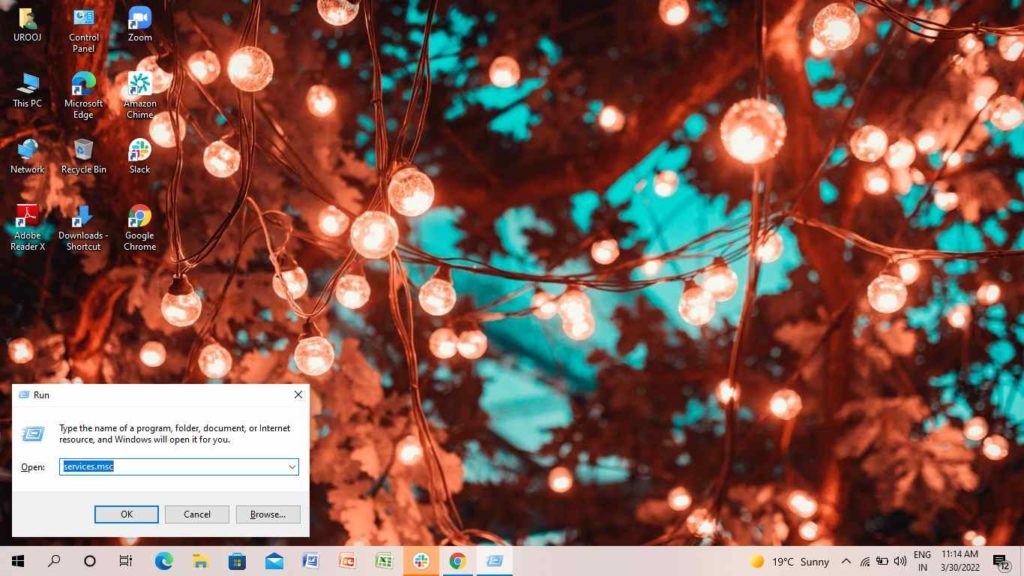
How to Stop Auto Update in Windows 10 With Run Folder?

Windows 10 automatic updates can easily be delayed with the help of the Run folder. This is the shortcut for disabling automatic updates on Windows 10. If you want to know how to stop auto update in Windows 10, go through the steps below-
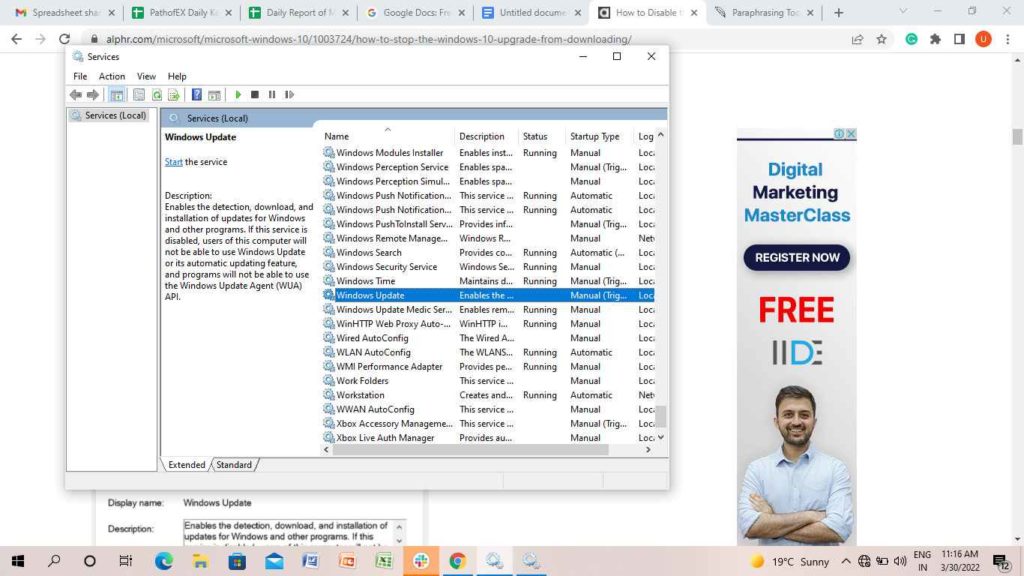
- On your keyboard, press the Windows key + R.
- In the box, write services.msc.
3. Click on Ok.
4. Navigate through the options and click on Windows Update.
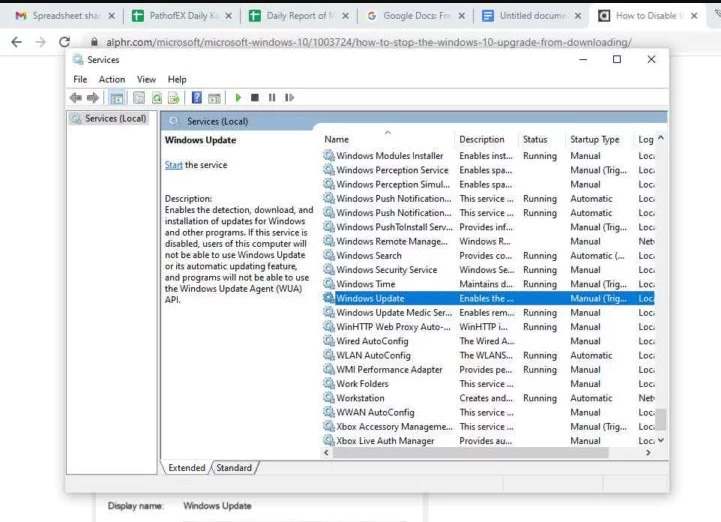
5. On the next page, go to the Startup type option.
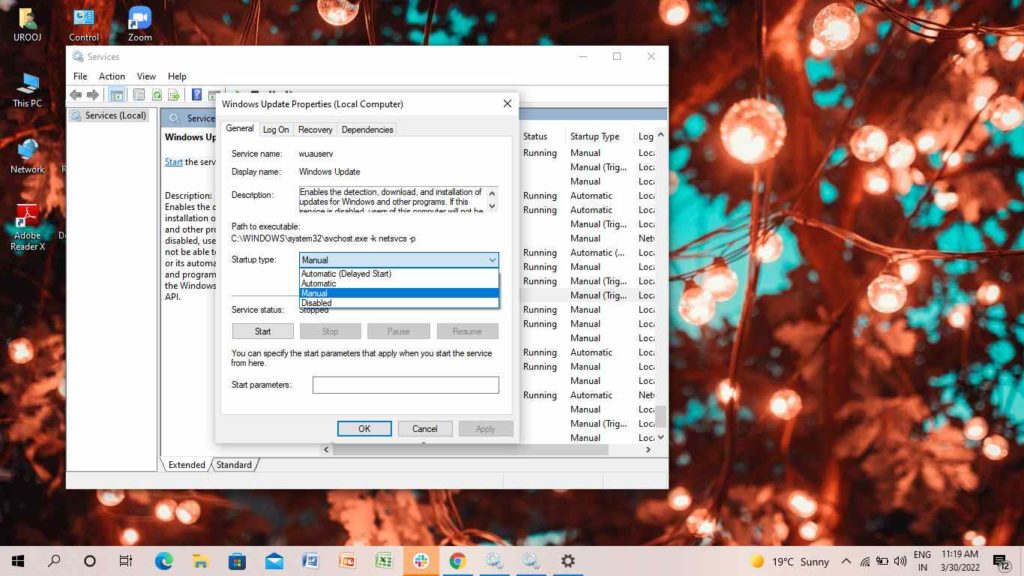
6. In the drop-down menu, Click on Disabled.
7. Finally, tap on Ok.
With the help of the above steps, you can stop auto update in Windows 10. If you want to enable it again, follow the same steps. In step 6, click Automatic.
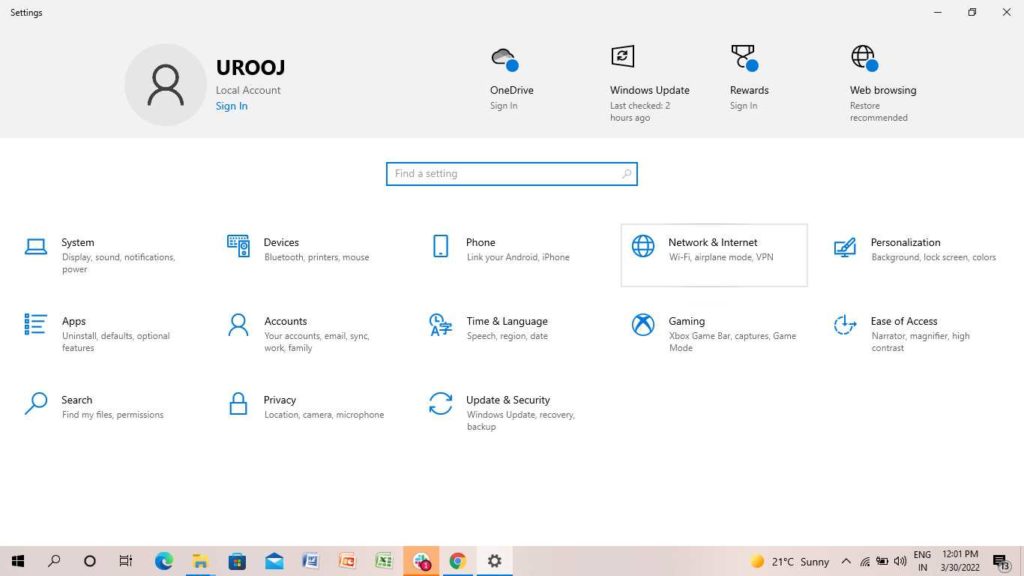
How to Stop Auto Update in Windows 10 in Settings?
Another option that can help you stop auto update in Windows 10 is super easy. You can stop it in the settings option. For this, follow the steps below-
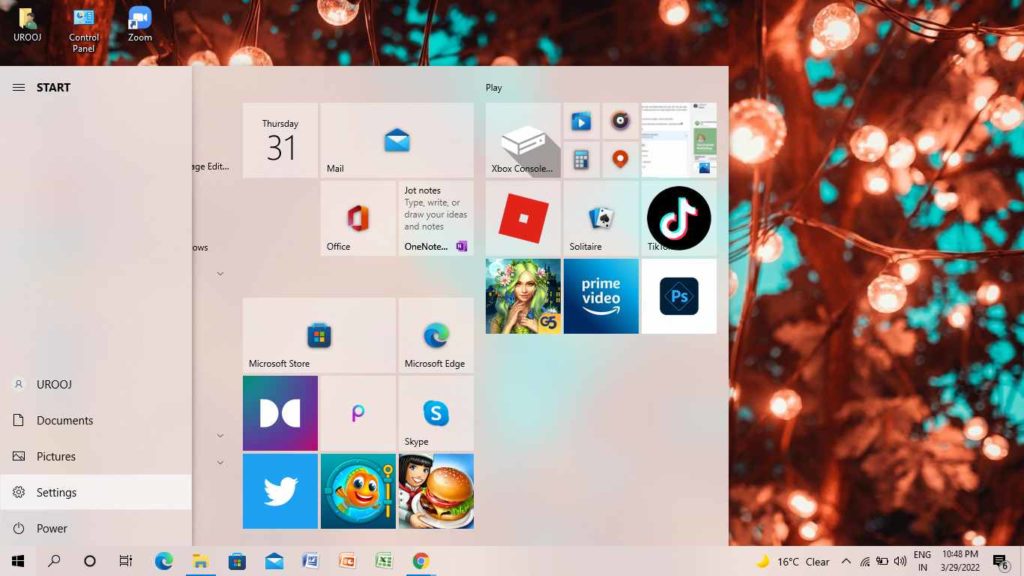
- Go to the Windows icon (Start menu) on the left side of the screen.

2. Click on Settings.
3. Tap on Update and Security.
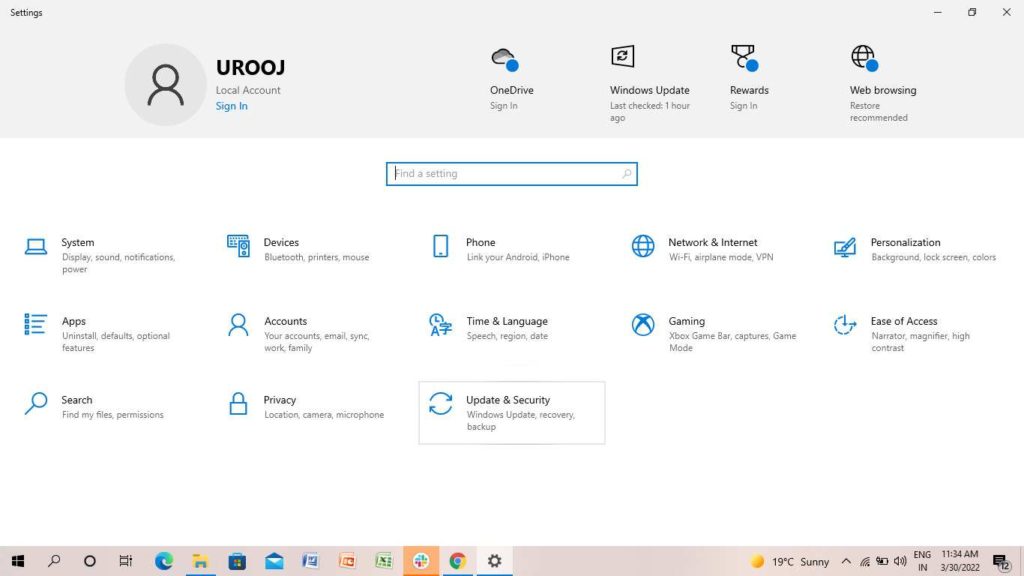
4. Click on Advanced options.

5. Schedule the Date and pause the automatic updates accordingly.

How to Stop Auto Update in Windows 10 in Control Panel?
The easiest method is to stop automatic updates in the control panel. If you want to know how to stop auto update in Windows 10 in the control panel, follow the steps below-
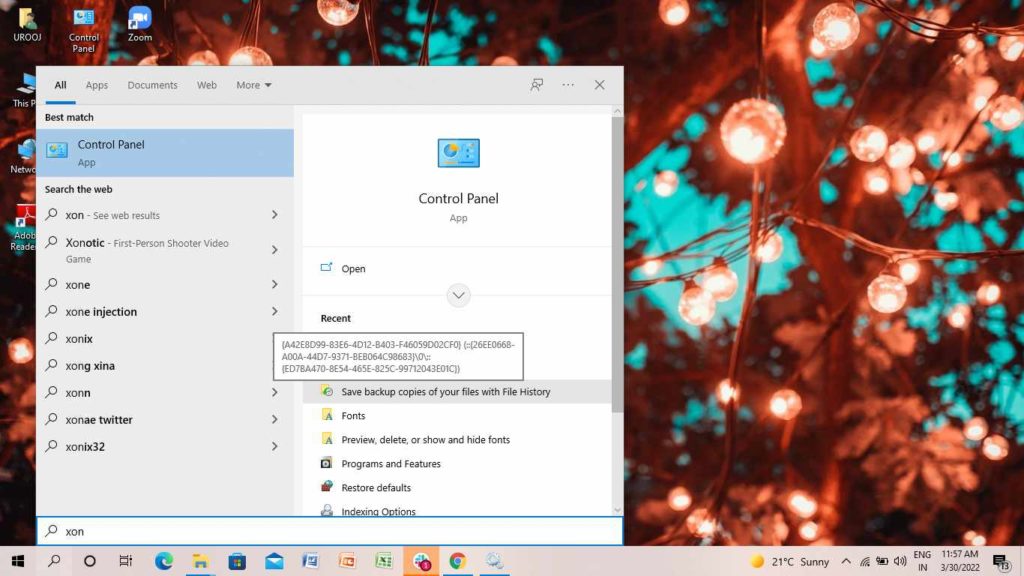
- Go to the Windows icon and click on the Search icon on the right side of the screen.
- Open the Control Panel.
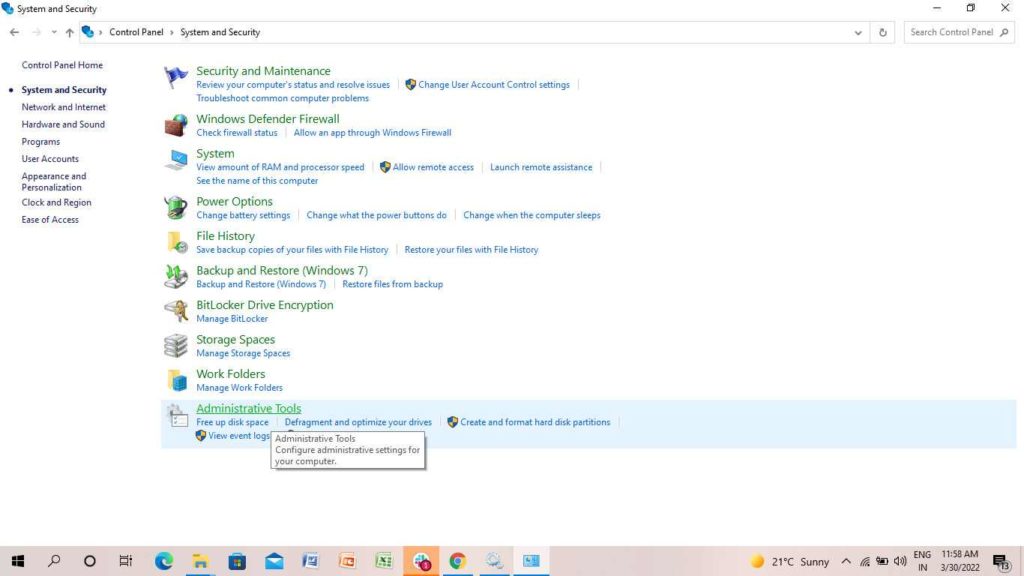
3. Click on System and Security.

4. Click on Administrative Tools.
5. Click on Services.
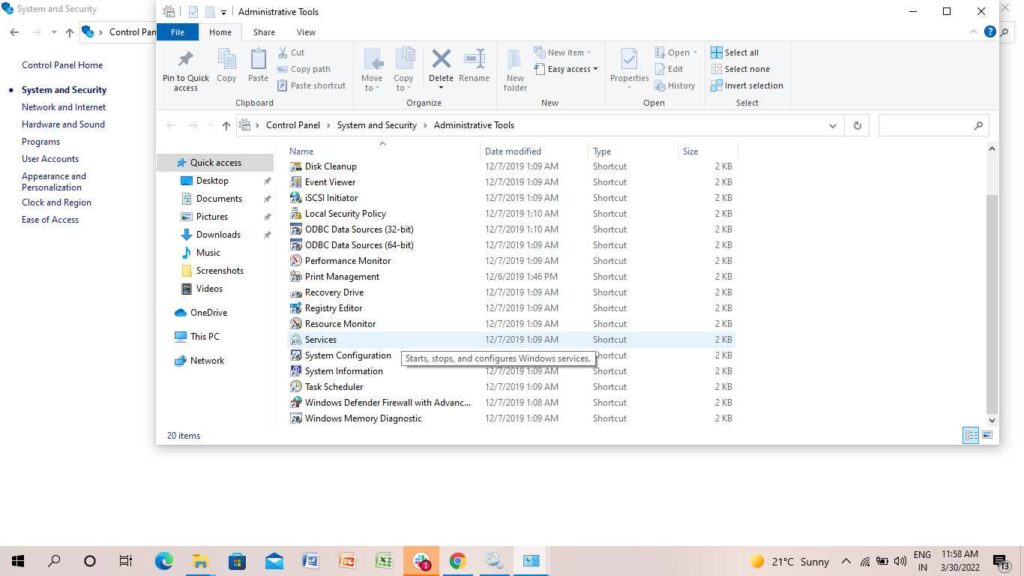
6. Navigate through the options and click on Windows Update.
7. On the next page, go to the Startup type option.
8. In the drop-down menu, click on Disabled.
9. Finally, tap on OK.
How to Stop Auto Update in Windows 10 in Metered Connection?
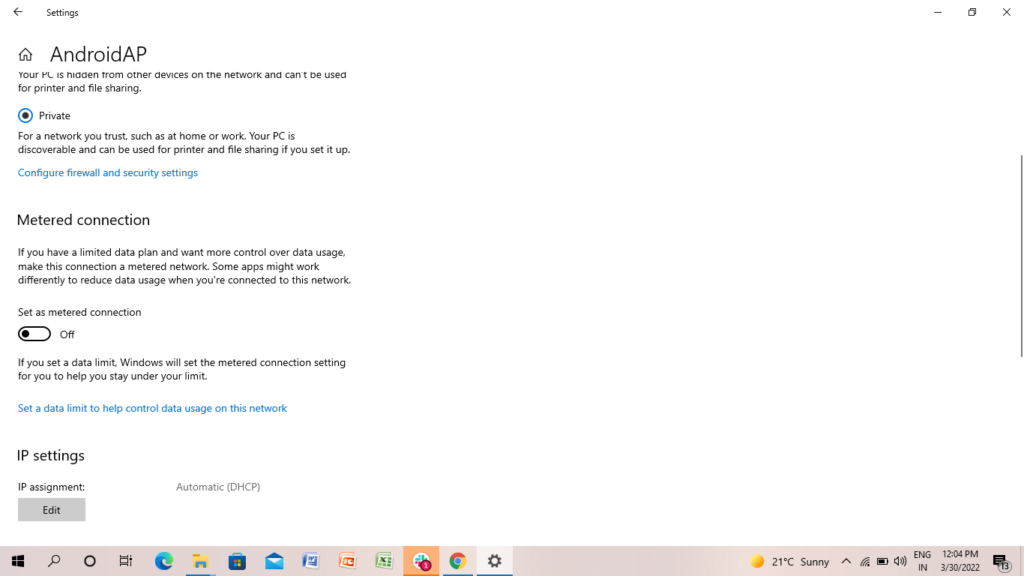
Before diving into the settings, the metered connection is an option that appears when you are connected to a Wifi on your desktop. If you want to stop auto update in Windows 10 with the help of metered connection, follow the steps-
- Go to the Windows icon (Start Menu) on the left side of the screen.
- Click on Settings.
Or
On your keyboard, press Windows key+I.

3. Click on Network and Internet.
4. Click on Properties.
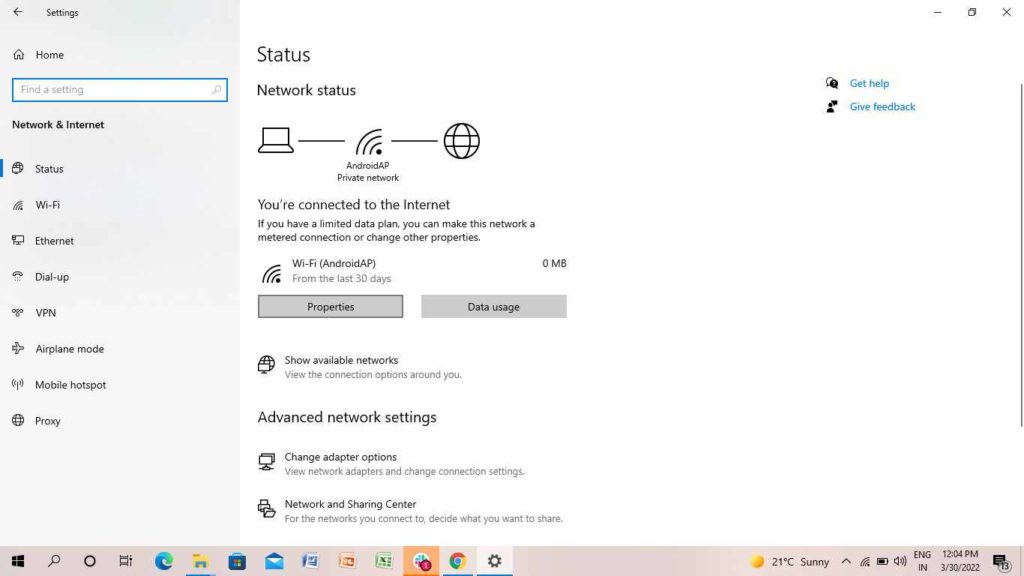
5. Drag the slider and turn the Metered Connection on.
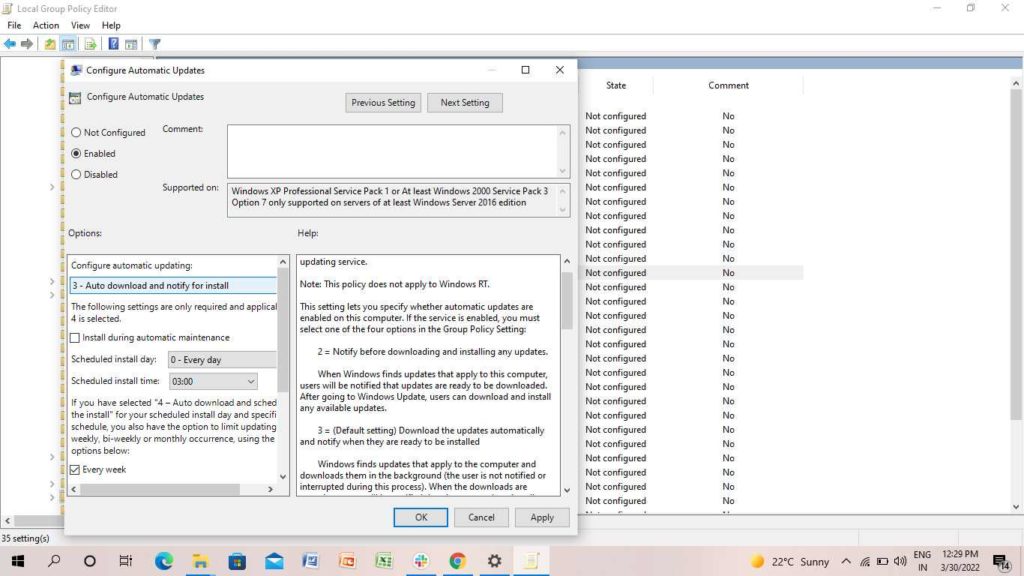
How to Stop Auto Update in Windows in Windows 10 in Group Policy Editor?
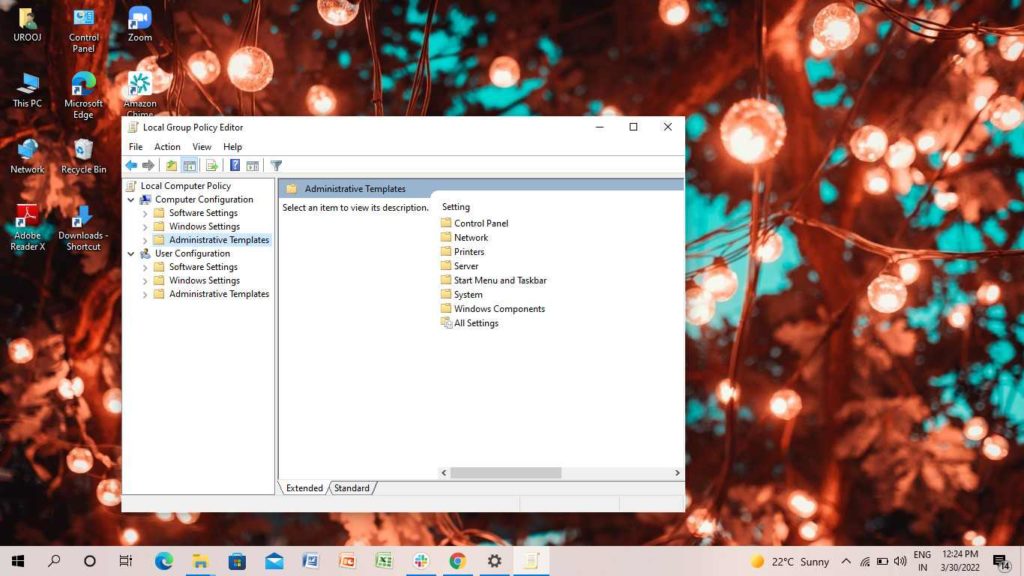
Group Policy Editor is another option that can help you to give a pause to your automatic updates. With the help of this option, you will get a notification that the updates are available for you. If you want to know how to stop auto update in Windows 10, follow the steps below-
- On your keyboard, press the Windows key + R.
- Click on Ok.

3. Click on Administrative Templates.
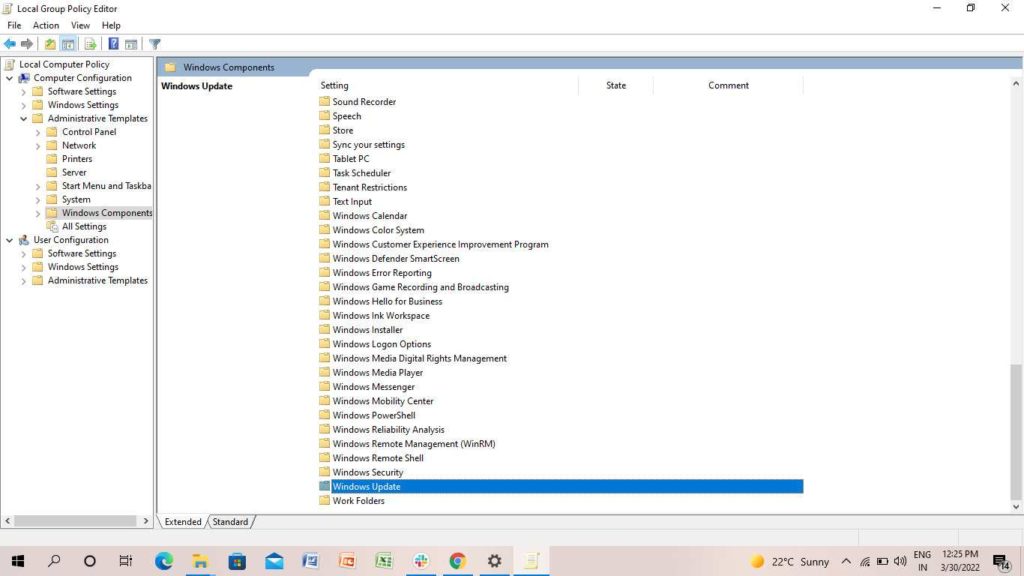
4. Click on Windows Components.
5. Click on Windows Update.
6. Click on Configure Automatic Updates.
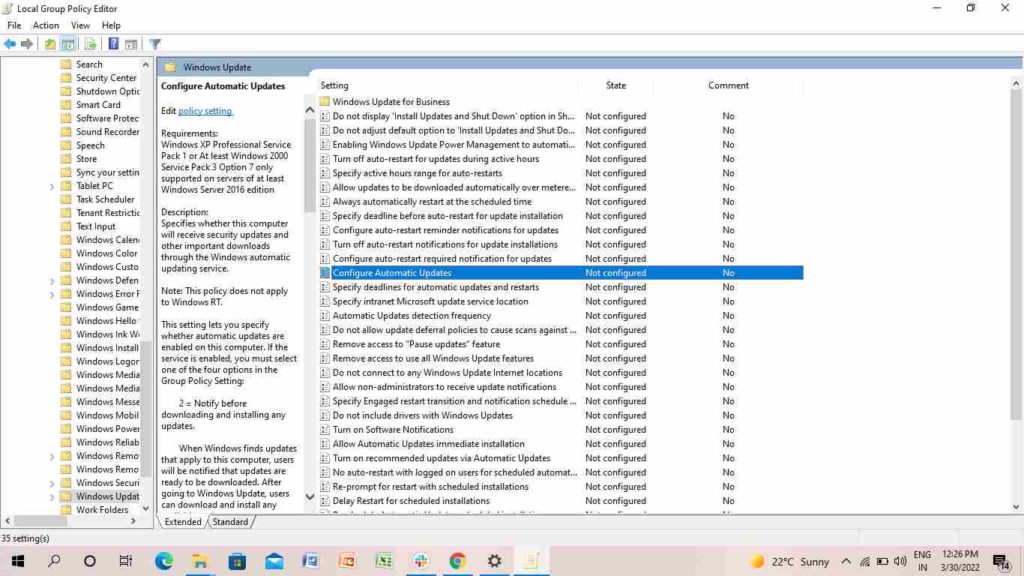
7. Click on Disabled.
8. Tap on Ok and finally click on Apply.
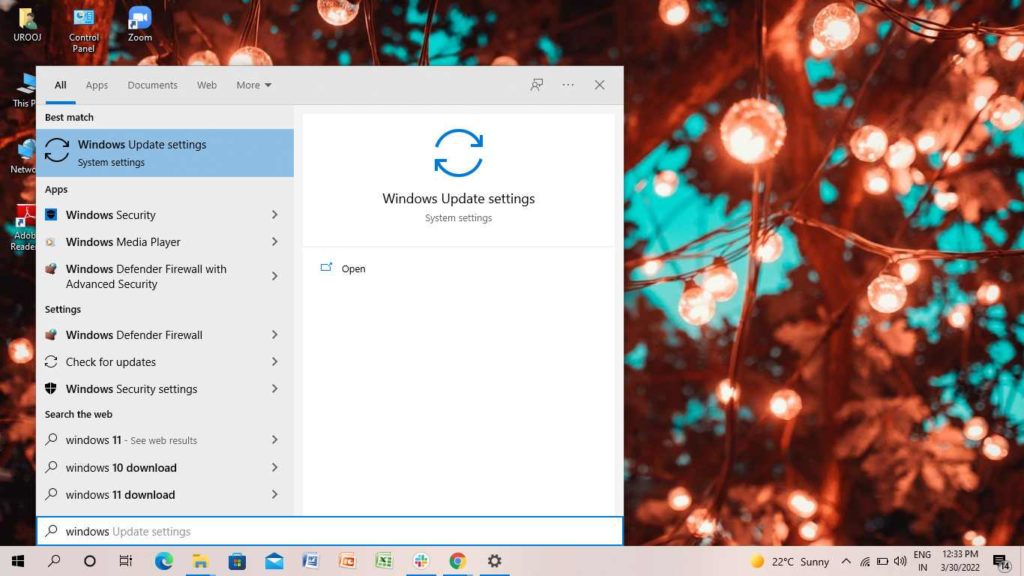
9. Go to the Windows Start icon and search Windows Update Settings.
Thus, with the help of the above settings, you can stop the auto update in Windows 10, and you will get notified of the same. You can download and install them according to your convenience.
Note:- These options appear on Windows 10 without the Home edition.
For Windows 10 with Home edition, follow all the steps from 1 to 6. However, in step 7, follow these steps-
7. Click on Notify for download and auto-install.
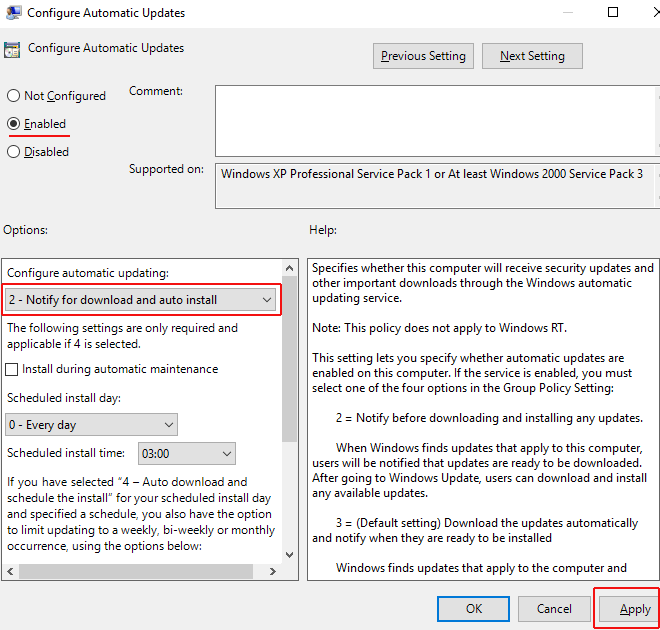
8. Tap on Ok and finally click on Apply.
Wrapping Up
This was all about how to stop auto update in Windows 10. Follow these steps and give a temporary pause on the automatic updates. I hope this article was useful to you. Feel free to share the article with your friends. Keep visiting Path of Ex for all the updates. Have a good day!
Frequently Asked Questions
Can I disable the Windows update permanently?
Yes, you can pause the Windows updates for 35 days. However, you need to download and install the updates at your convenience to enjoy the enhanced features on your device.
Should I disable updates?
Yes, you can disable updates for some time. However, you have to make sure to install them for the security of your device.
Is there any Windows update blocker tool?
Yes, there are various Windows update blockers too like Windows update blocker, StopUpdates10, Wu10Man, Kill-Update, and many more.