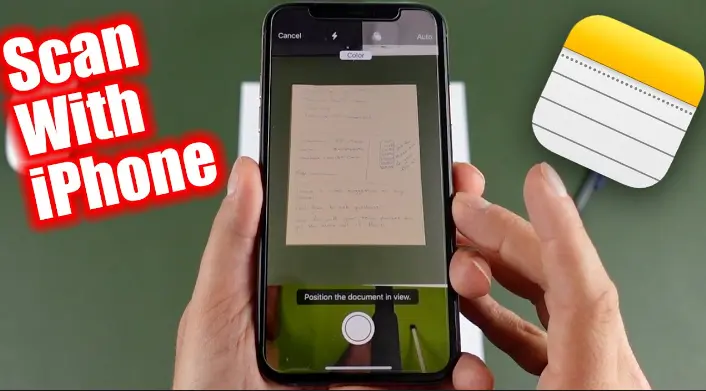
Are you using an iPhone? Do you want to scan documents? Now you do not need to go to shops and wait for your turn to get a scanned document for your files, handwritten notes, and other necessary paperwork. It is because you can scan any document or handwritten notes using your iPhone. But unfortunately, many of you might not know you can use the Notes app on your iPhone to scan documents. So, you should know: How to Scan Documents on iPhone.
Scanning documents using the “Notes” app is a simple and easy process. Only a few clips are required, and you’re done scanning the document. Interestingly, you can scan your essential documents to your Mac from your iPhone. So, you can keep all your documents handy every time on your iPhone by scanning them. And you can also convert your scanned documents into PDF files.
In the below post, I will help you get the steps to scan documents on your iPhone from the Notes app. You can also scan documents to your Mac from your iPhone. I will also guide you to convert your scanned documents into PDF files.
In This Article
How to Scan Documents on iPhone? 2 Methods Step-Wise Guide
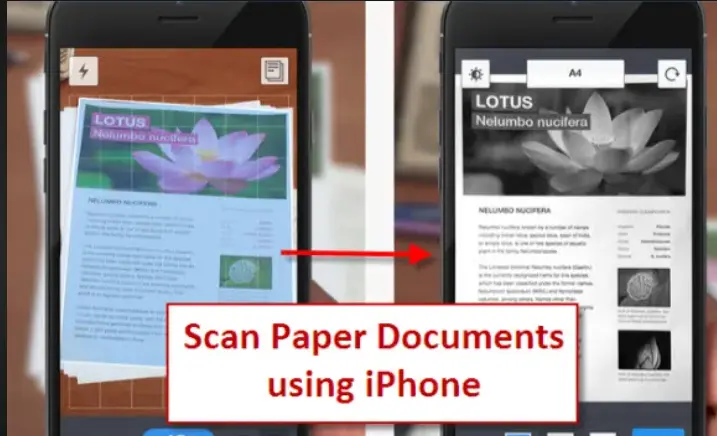
With the help of your iPhone, you can scan any document, whether handwritten notes, files, important documents, etc. You can scan documents on the iPhone in two ways. And both methods will help you create PDF documents for the scanned copy.
Method 1: How to Scan Documents on iPhone From Notes App?
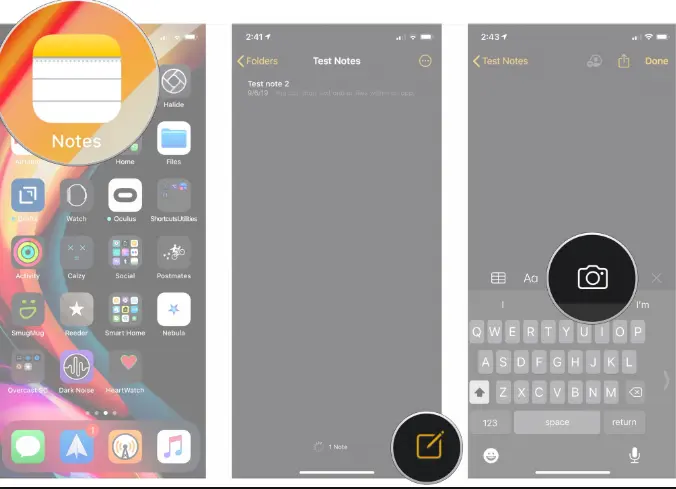
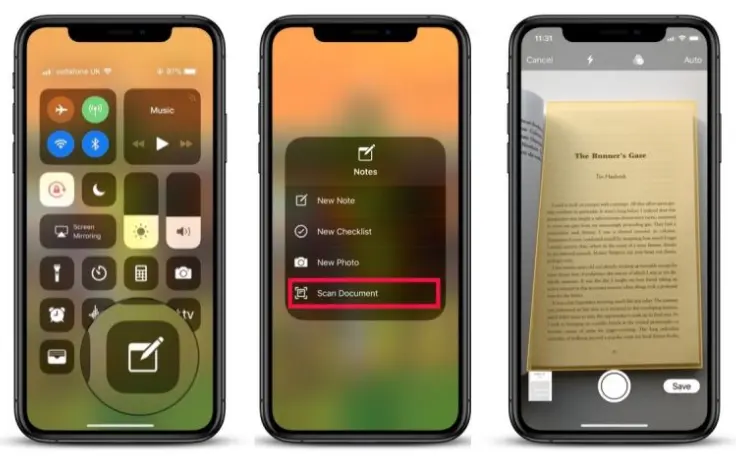
- Tap on the “Notes” app from your iPhone apps section.
- Create a New Note (📝) or select any already created.
- Click On the Camera (📷) symbol.
- Press the “Scan Documents” button from the options at the bottom.
- Click on the three overlapping circle symbols from the options present at the top.
You are now enabled to see and select the different colors mode. In addition, you can now choose the color mode you want to apply to your document.
a) Color: You can select this option to scan a document without selecting shadows and colors unavailable on the page.
- Greyscale: This is a good option if you want a Black & White document that contains the images. Greyscale will apply the Grey shade to your complete document.
- Black & White: This is a perfect option if you want a text-only document in Black & White color shade.
- Photo: This is the best option if you want a colorful scanned document. The photo option will capture all the colors of both text and images.
- Select the Manual or Auto scan Mode.
a) Auto Mode: If your device is in “Auto” mode, your iPhone will automatically scan the document.
b) Manual Mode: Tap on the volume button or press (⚫) the shutter button to scan the document manually on your iPhone.
- Adjust the page fit size by dragging the corner edges.
- Press the “Keep Scan” option.
- Press on the “Preview” option.
- If you want to add more pages, choose “Add additional scans.”
- If scanning is completed, then press the “Save” button.
These steps will quickly resolve your query about How to Scan Documents on iPhone?
Note: By selecting the Preview option, if you want to scan the document again due to fit size issues or are not satisfied with the document loops, then you can tap on the “Retake” option.
Method 2: How to Scan Documents To Your Mac From Your iPhone?
You can scan any document to your Mac from your iPhone, iPad, or iOS device. The steps are quick and easy. But, before scanning the documents to your Mac from your iPhone, you need to fulfill a few conditions:
- Sign up on your Mac and iPhone using the same Apple ID.
- Keep your iPhone unlocked and handy as you start scanning the document.
- Enable both the wi-fi and Bluetooth on both your Mac and iPhone.
Now, you can start scanning your document by following the below steps:
- On your Mac, open the continuity support camera app.
- From the top Menu bar, press the “File” option.
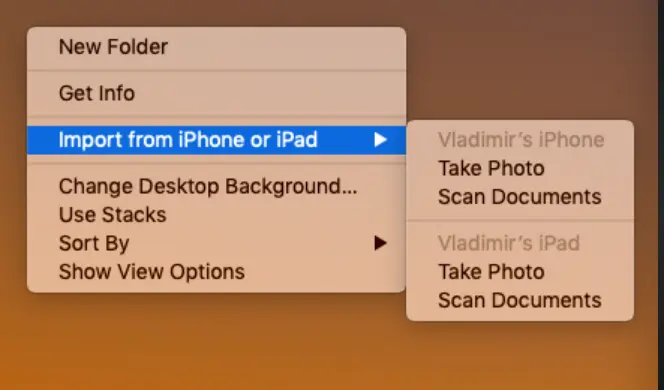
(Press the “Gear” menu to scan the document directly on the Finder.)
- Tap on the “Import From iPhone or iPad” option from the options.
- Again options will appear. Click on the “Scan documents” option.
- You can now scan the documents by pointing at the camera. The scan steps can differ depending on whether you use Manual or Auto mode.
a) Manual mode: Flutter your iPhone over the document until the part you want to scan is covered by the yellow border. Tap on (🟡) the yellow shutter button at the bottom center.
b) Auto Mode: (It is the default mode.): Just before the document is captured, a yellow border is visible around the corner edges. The scan is minimized to the left bottom corner, and a message will appear “Ready for next scan.” if the image is not visible correctly, you can crop it to get the corrections.
- After finishing the crop, tap on the “Keep Scan” option.
- “Preview” the scan pages, then press the “Save” option.
5 Quick Tips For The Best Quality Scans
Scanning the document in high resolution and with the best quality enhancement is important. Therefore, after mentioning all the steps for “How to Scan Documents on iPhone,” I am sharing the five best-researched tips so you can scan your documents with the best quality.
- Export your scan documents files in the highest available resolution.
- Make sure there is enough contrast between the chosen background. If the document file is on white paper, try to get a dark-colored background. If the document file is on colored paper, try to get a light background.
- Hold your breath so that the camera focus does not get blurred.
- Clean the camera specs, as it will capture the document focus sharply.
- Always scan the documents in the high-power light. Stand at the best angle to avoid glares and shadows.
How to Scan a Handwritten Note on an iPhone?
If you are studying or doing any other business, you sometimes need to send your handwritten note to your mates. However, you might not know “How to Scan Documents on iPhone like Handwritten Notes.” Therefore, follow the below pointers to scan the handwritten note on an iPhone.
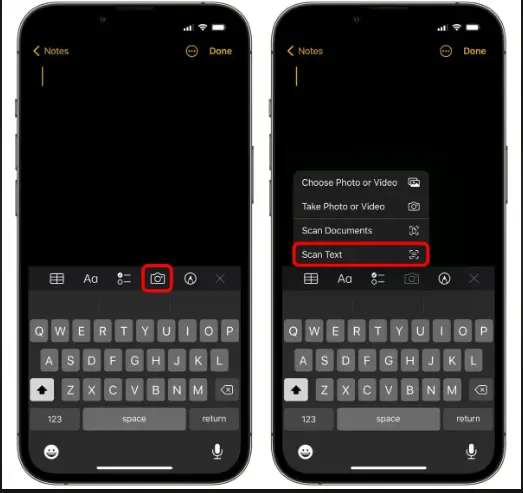
- Launch the “Notes” app.
- Create a “New Note.” To do so, tap on the (📝) pen-paper icon.
- Click on the camera (📷) symbol.
- A menu will now pop up. Select the “Scan Text” option.
- Hover your iPhone’s camera on the document that you want to scan.
- Tap on the “insert” option. Present at the bottom of your iPhone’s screen in blue color.
- And finally, you can press the “Save” option.
Note: If your iPhone scans the document automatically, tap the “Auto” option at the top-right corner to switch the mode to manual.
How to Scan Documents on iPhone to PDFs Files?
To archive and organize the documents on your iPhone faster and easier, scanning the documents in PDF files is recommended first. Then, you can convert your scanned documents from the “Notes” app into PDF files. The process is simple and easy.
- After scanning the document from the Note app (a step-wise guide is shared above), click on the “Scanned Document” option. You can now scroll all the pages thoroughly that you have scanned.
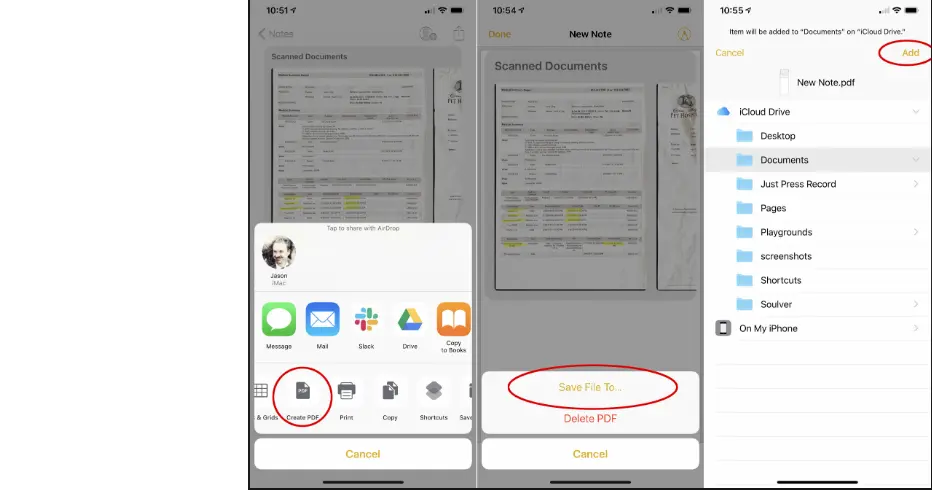
- Tap on the share (⬆️) option at the top right corner.
- At the bottom of the shared sheet, you will see “Create PDF.” Click on it.
- Your document Preview is visible now.
- Before saving your PDF document, if you want to draw something on your PDF document, click on the “Markup” button. This is at the upper right corner, only visible as a pen tip.
- Tap on the “Done” option in the upper left corner.
- Now three options will appear: “Save File To,” “Delete PDF,” and “Cancel.”
- Click the “Save File To” option to save your PDF document. After selecting the save option, it will also enable you to know the location of your saved PDF document.
How to Scan Documents on iPhone With the Notes App?
Wrapping Up
You can use your iPhone to scan your handwritten files, important pages, or any documents from the notes app. For the question: “How to Scan Documents on iPhone?”I can answer; you can also scan the documents to your Mac from your iPhone. The steps are straightforward and quick. As a result, you can keep your documents handy and not suffer for your work just because you lack documents.
Have you ever tried scanning the document on your iPhone? At which step did you find it difficult? Please comment below. Also, please share this blog with your friends and family and guide them to scan the document from their iPhones.
Frequently Asked Questions
Which third-party apps can I use to scan the document on my iPhone?
You can safely and wisely use Adobe Scan, CamScanner, and Scanner Pro on your iPhone safely and wisely.
Can I share scanned documents from my iPhone?
Yes, you can share the scanned documents from your iPhone by clicking on the “Share” option in the Notes app. You can also share your scanned documents by exporting the files to another app.
Can I scan handwritten notes on my iPhone?
Yes, you can scan handwritten notes on your iPhone using the Notes app or on your Mac from your iPhone.
How can I delete a saved note?
From your Notes list, drag the one to the left side. Now, from the icons on the right side, tap on the bin option.
How can I save the PDF document to another cloud service?
After clicking on the “Create PDF” option, instead of pressing the “Done” option, tap on the “Share Menu” button present at the lower left side.
You can now send your PDF to any app that supports the “Share” Menu and “PDF File” type, including Google Drive, Mail, Slack, or any other option.