We all love playing Minecraft, but you’re probably tired of vanilla Minecraft on your server and want to try something different. Then, here is something that can come in handy. Try something new by learning to install Minecraft mods and give a new vibe to our Minecraft game.
A fantastic method to personalize your gaming experience is to run a customized Minecraft server. Mod play, however, involves more than just adding files to your site. Every mod that enters your server must be executed client-side. Since mods are not supported by Minecraft by default, you must use Forge, a mod loader.
You can install Minecraft mods in a variety of methods, either by manually installing Forge and the mods or by utilizing a launcher like the Twitch Desktop App. This Minecraft guide will help you learn how to install Minecraft Mods, Forge add-ons and upload mods on an already-running Minecraft server running on Windows, macOS, or Linux!
In This Article
What Are Minecraft Mods?
Mods are user-made alterations to an original game. New items, blocks, resource packs, interface tweaks, and general player quality-of-life enhancements are frequently included in Minecraft mods.

The power to modify virtually everything to create a distinctive Minecraft experience is the fundamental appeal of modifications. It’s important to note that for any mod to function, it must be installed automatically on both the server and the client.
What Do You Need Before You Install Minecraft Mods?
Make sure you’ve set up a Minecraft server (Java Edition) and installed the Java Development Kit before continuing to install Minecraft Mods.
Before downloading Forge and uploading mods, keep the following in mind:
- The Java Edition of Minecraft is used by the majority of servers. Unfortunately, the Bedrock Edition only supports add-ons from the Mojang Studios Minecraft shop and does not accept mods.
- The RAM utilization will rise with each additional mod, so ensure your server has enough power.
- Before adding any changes, make a server backup so you have a restore point in case something goes wrong.
- When installing mods, the server must be stopped. If the server is already running, the installation can still be successful, but no changes will be visible until the server is restarted.
Note: Installing mods one at a time will help guarantee that they all function properly and save time if troubleshooting is required. So install Minecraft Mods very precisely.
How To Install Minecraft Mods?
We can move on to install Minecraft mods now that the JDK has been installed and your Minecraft server is up and running. Before you install Minecraft Mod, keep in mind that mods on your Linux-based Minecraft VPS, and make sure to follow the instructions provided by your particular hosting company.
Steps to install Minecraft Mods on your device:
1. Install Minecraft Forge
Minecraft Forge is the most widely used Minecraft mod add-on. It enables users to manage and install mods for Minecraft’s Java Edition. Users of Linux and macOS will see comparable installation procedures. To install Minecraft Forge on a Windows Minecraft server, look at the steps below:
- Download Minecraft Forge’s latest version through its official website.
- Open the Forge installer once it has been downloaded.
- Players can join the Forge server with the client version. If you receive an error message about a missing Minecraft profile, ensure that Minecraft’s default launcher is installed and working.
- Install the server again by running the installer again. You need to specify the directory where your vanilla Minecraft server will be installed. The installation can be continued despite the warning message.
Note: Double-click the run file in the newly created folder. A Minecraft server with Forge will be started. You will see an error message regarding the EULA – locate the file eula.txt and open it. The eula=false line should be changed to eula=true. Reopen the run file once that’s done.
2. Download the Mods You Want
The next step is to download mods for Minecraft. I advise you to use well-known websites like CurseForge or Minecraft Mods. If the aforementioned websites don’t have the mod you’re looking for, proceed with extreme caution. Mods from shady websites might be infected with viruses or malware.
- Open the website and verify the version of Minecraft listed on the mod page; your game must correspond to it.
- After completing that, select Download.
- The download will begin. (Also load Just Enough Items)
- You must extract some mods before installing them because they are packaged in.zip archives.
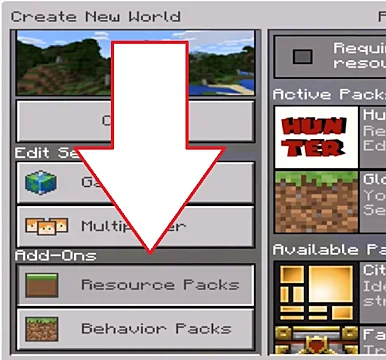
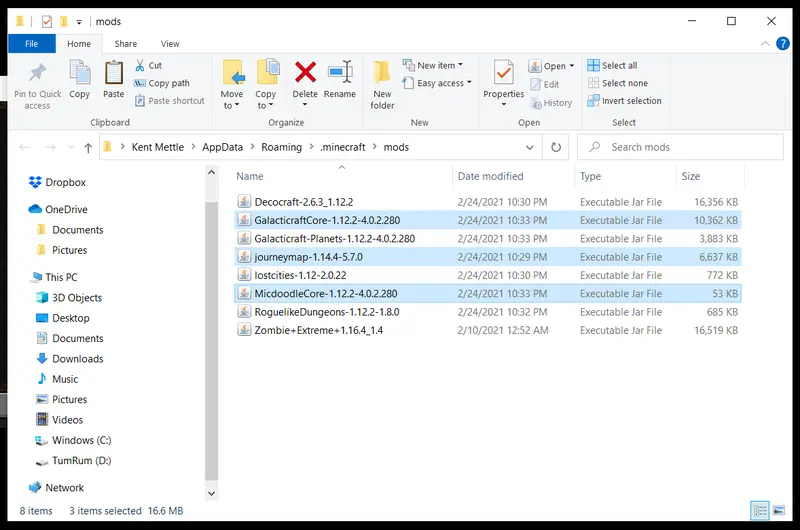
3. Copy the Mod to the ‘/mods’ Folder
It’s time to copy Minecraft mods. The procedure will be remarkably identical regardless of your operating system.
- Access your vanilla Minecraft installation’s mods folder.
- If the folder is missing, make a new one and give it the name “mods.”
- Copy the downloaded mod, then paste it into modifications. (The mods folder in your Minecraft server installation path should be treated the same.)
Finding the Windows Mods Folder
Your Minecraft client’s modifications folder is often found in the Minecraft folder with the path:
Users/Windows-Name/Appdata/Roaming/.minecraft.
You can also do it by pressing Control + R, entering %appdata%, and then press Enter. Once you’ve located the. Minecraft folder, open the mods directory and paste your mod files there.
Locating the Mods Folder on macOS
- /Library/Application Support/Minecraft is the default location for the Minecraft client.
- By opening Finder with Command+Shift+G and going to Library -> Application Support -> Minecraft, you can quickly get to it.
- Open Terminal and enter the following command to locate the Minecraft client directory on Linux-based PCs.
4. Check the Mod Installation
Having trouble making sure you install the Minecraft mod that is working properly after the installation process. So run Forge and take the following actions to complete it:
- Click Play after opening the Minecraft launcher, choosing forge from the dropdown menu in the lower left corner.
- Click Mods once the Minecraft main menu has loaded.
- Just Enough Items (JEI), which we previously loaded, will be among all the installed mods that are visible in the left sidebar.
- Select Multiplayer and add the address of your server if you want to see if the mods are functional there. The server address will be localhost in this example because the client and server versions of the game are being executed on the same computer.
Wooh! So you learned everything about how to install Minecraft mods and what these mods are. Now let’s learn what you should do when your mod is not working.
What Should I Do If the Minecraft Mods Don’t Work?
At times after you install Minecraft Modes, they stop working due to technical errors or the system doesn’t support the mode you installed. So to get rid of this problem, you can scroll down and check out the suggestions mentioned below and follow them before you install Minecraft modes.
Check out these troubleshooting suggestions if your installed Minecraft mods aren’t working:
- Make certain that Forge is installed properly.
- Verify that forge is chosen in the Minecraft launcher.
- Make sure the mods are set up on Minecraft’s client and server versions.
- Verify again to ensure the mod version matches the Forge version and that there aren’t any duplicate modules.
- Make sure you’re using the original version of Minecraft and that the mods you got came from a reputable source.
- Verify the mods directory once more.
- There are requirements for some mods that must be installed.
Wrapping Up
So this was all about the procedures to install Minecraft Mods. Now you won’t get bored with one single mod in Minecraft while playing. So install these, start playing with your friends, and enjoy the all-new games with more fun. You can also check out other games and their mods on Path of EX and play them. Don’t forget to mention your favorite mod in the comment section and give your views and suggestions.
Happy Gaming!