If you wonder, “How do I delete my Facebook account,” I will provide you with all the steps and expert tips to smoothly escape from Facebook and move on with your life. Whatever the reason may be behind your decision, you have chosen to delete Facebook account and say goodbye to the social media giant. But before you hit that delete button, you should consider a few things.
Deactivating your account is just a temporary fix, and let’s be real, we all know you’re not coming back. No, it’s time to take the plunge and delete Facebook account for good. But don’t worry; I won’t reveal any of the main steps or processes here (that’s what the main article is for). I want to give you a few reasons why deleting your Facebook account might be the best decision you ever make.
Ready to say goodbye to the constant notifications and the pressure to present a perfect online persona? Ready to reclaim your time and privacy? Then what are you waiting for? Scroll to the main article, and let me guide you through the guide on how to delete Facebook account. Trust me; you won’t regret it.
In This Article
How Do I Delete My Facebook Account?
Deleting your Facebook account can be a big decision, as it will permanently delete all of your data and content from the platform. This includes any photos, posts, and other information you have shared on the site. If you’re considering deleting your account, it’s important to understand the implications of this action and to be sure it’s the right decision for you.
Below are the various methods you can use to delete your Facebook account, including using a computer, the Facebook Android app, or the iOS Facebook app.
How to Delete Facebook Account on Computer?
Follow the steps outlined below to learn how to delete Facebook account on a computer:
Step 01: Launch a web browser on your computer, log in to your FB account, and click your profile picture in the top right corner of the page.
Step 02: From the dropdown menu, select Settings & Privacy, then Settings.
Step 03: Hit Privacy from the left-hand menu, and then select Your Facebook Information.
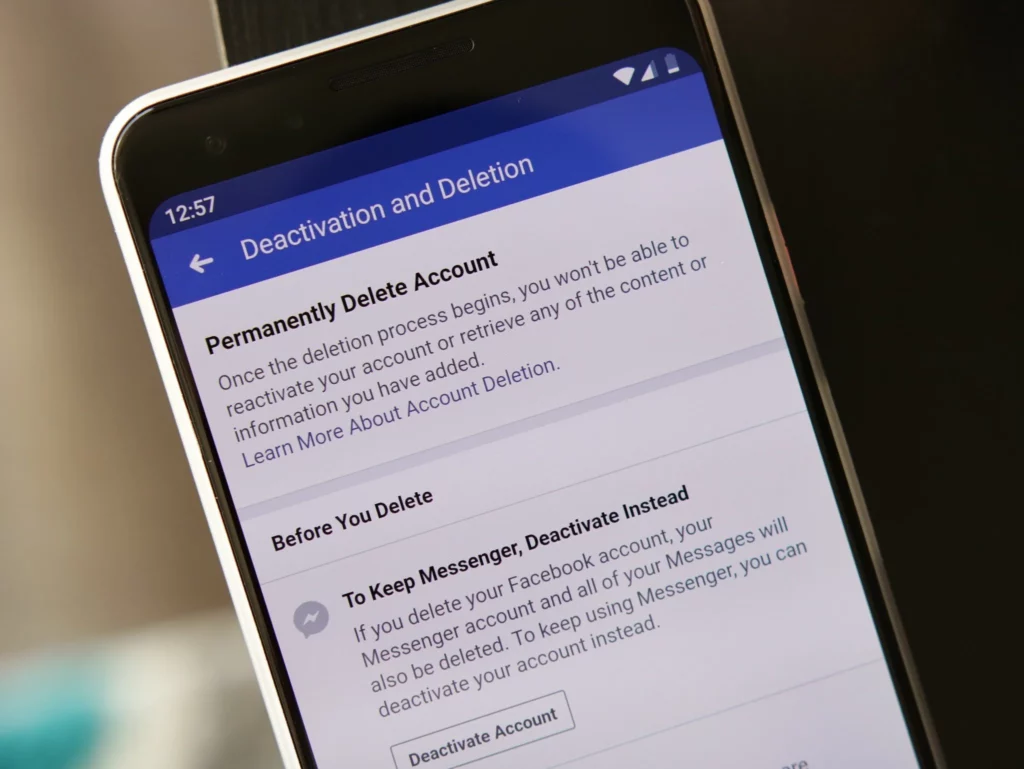
Step 04: Under the Deactivation and Deletion section, click on View.
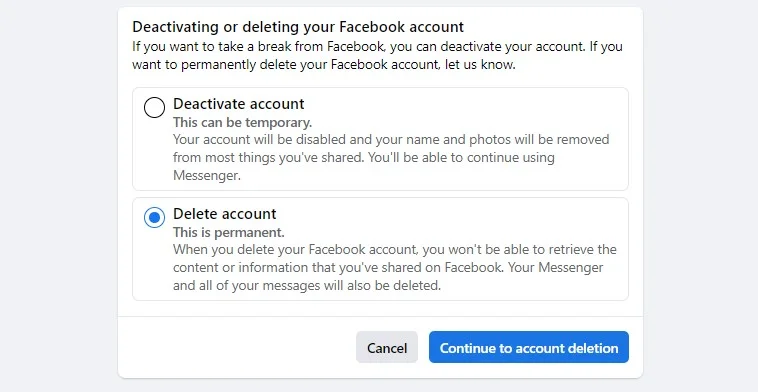
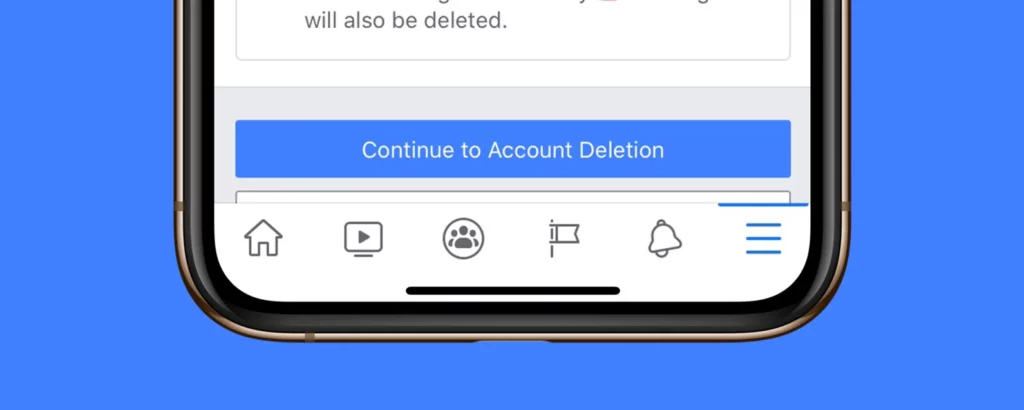
Step 05: Select Delete Account, then click Continue to account deletion.
Step 06: Click Delete Account, enter your password and then click Continue.
How to Delete Facebook Account on iOS App?
To delete Facebook account on your iPhone follow these steps:
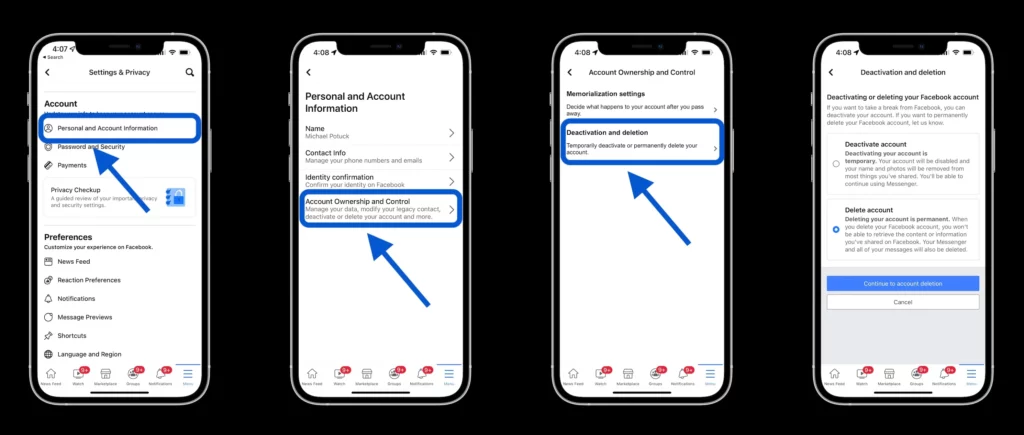
Step 01: Tap the menu icon in the bottom right of the main profile screen.
Step 02: Scroll down and tap Settings and privacy, then tap Settings.
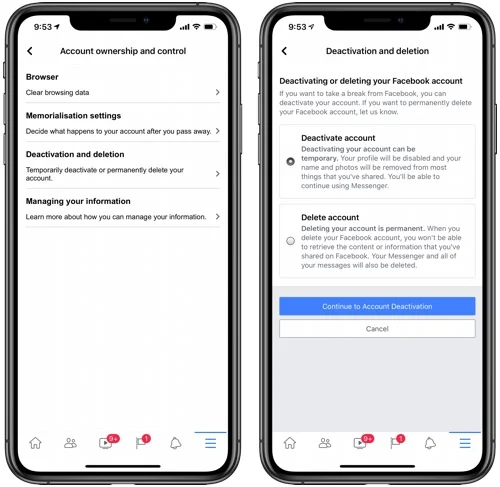
Step 03: Tap Profile Access and Control.
Step 04: Tap Deactivation and deletion.
Step 05: Choose Delete Account and tap Continue to account deletion.
Step 06: Follow the instructions on the screen to complete the account deletion process.
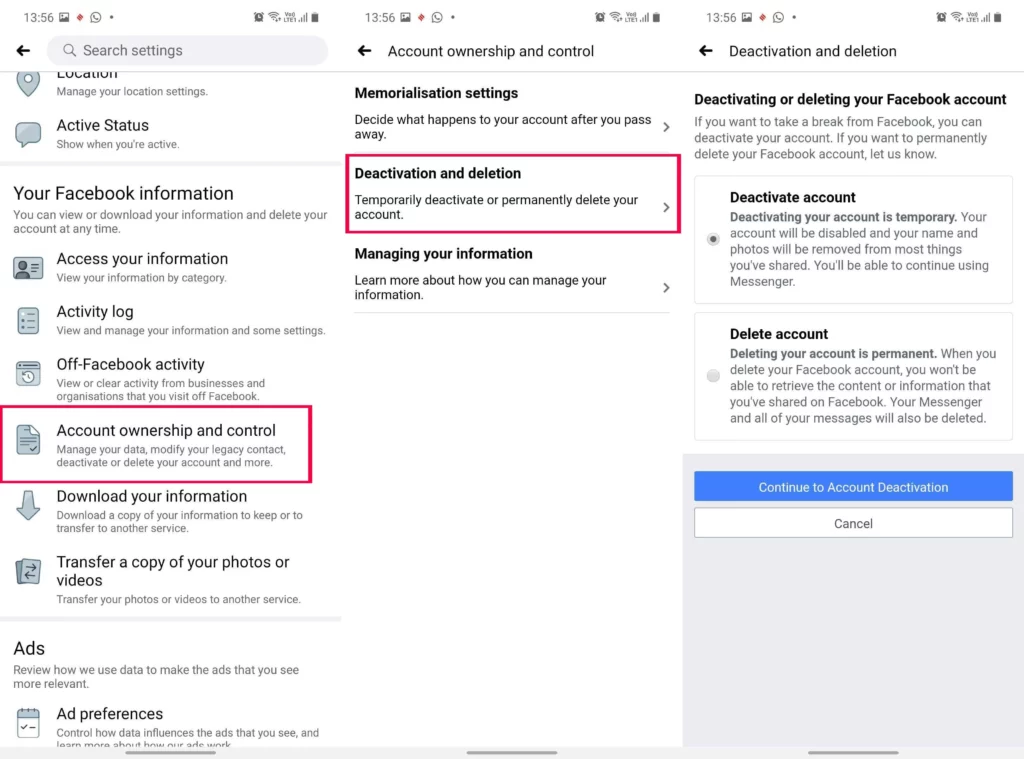
How to Delete Facebook Account on Android App?
Here is how to delete Facebook account on the Android app:
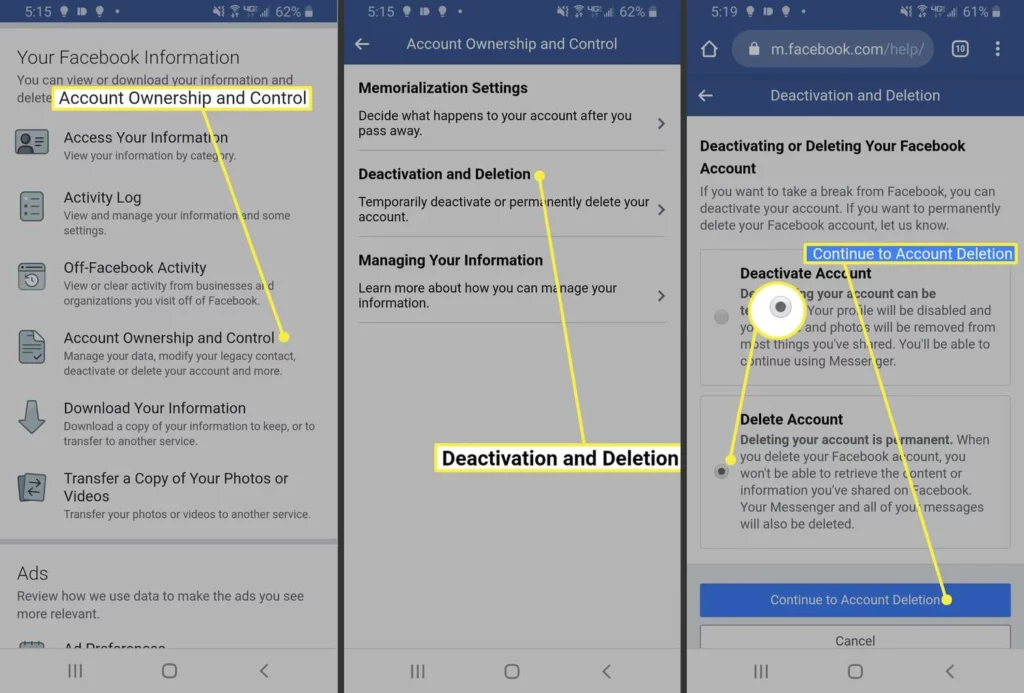
Step 01: Tap the menu icon in the top right of the app.
Step 02: Scroll down and tap Settings and privacy, then tap Settings.
Step 03: Tap Profile Access and Control.
Step 04: Tap Deactivation and deletion.
Step 05: Choose Delete Account and tap Continue to account deletion.
Step 06: Follow the instructions on the screen to complete the account deletion process.
Consequences of Permanently Deleting Your Facebook Account
Permanently deleting your Facebook account is a significant choice with long-term implications. Before proceeding, it is critical that you understand what will occur.
You will not be able to reactivate your account or access any of the stuff you have on it after you delete it. Your profile, images, posts, videos, and any other information you have on the network are all included. Your account and all of its contents will be permanently erased and will not be recoverable. Furthermore, you will no longer be able to access Facebook Messenger or log in to any other applications or websites using your Facebook account.
While deleting your account would erase the majority of your information from the site, certain information, such as messages written to friends, may still be viewable to them after you delete your account. Copies of these communications are saved in the inboxes of your pals. If you are concerned about the privacy of your information, contact your friends and notify them that you will be canceling your account.
Finally, if you log in to Oculus using your Facebook account, removing your Facebook account will also destroy your Oculus information, including any app purchases and accomplishments. You will no longer be able to return applications, and all current store credits will be forfeited. If you have major material or investments in Oculus, you should think about this before canceling your Facebook account.
How to Cancel Account Deletion on Facebook?
If you’ve recently initiated the process of deleting your Facebook account but have changed your mind, you may be able to cancel the deletion if it’s been less than 30 days. After 30 days, your account and all of your information will be permanently deleted and cannot be retrieved.

It may take up to 90 days for Facebook to delete all of the information you’ve posted on the platform. During this time, the information will not be accessible to other users. However, copies of user account information may remain in backup storage for purposes such as disaster recovery, software errors, or data loss prevention. Facebook may also retain users’ information for legal or harm-prevention purposes.
To cancel your account deletion:
Step 01: Log in to your Facebook account within 30 days of deleting it.
Step 02: Click Cancel Deletion.
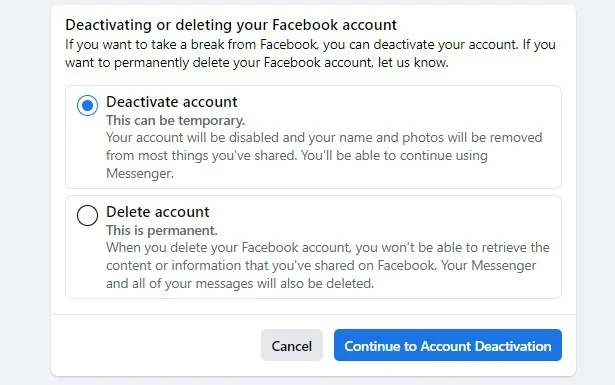
Temporary Deactivation of Your Facebook Account
Facebook can be a great platform for connecting with friends and family, but it can also be overwhelming at times. If you’re feeling overwhelmed and want to take a break, you have the option to deactivate your account temporarily. Deactivating your account will hide your profile, photos, posts, and videos from other users, but they will not be deleted. This means that you can choose to come back to Facebook whenever you’re ready, and your information will still be there waiting for you.
While your account is deactivated, you will still be able to use Facebook Messenger. However, your profile picture will be visible in your conversations, and people will still be able to search for you by name to send you a message. This means that you may still receive messages from friends while you’re away, but they won’t be able to access your profile or see your posts. You will continue to appear to friends on Facebook in places where they can message you.
Additionally, you will still be able to use Facebook Login for other apps such as Spotify, Pinterest, or Games. However, you will not be able to use your Facebook account to access Oculus products or your Oculus information. If you’re an avid Oculus user, it’s important to keep this in mind before deactivating your Facebook account. Overall, temporarily deactivating your Facebook account is a good way to take a break from the platform without permanently losing your information or connections.
Let’s learn how to deactivate Facebook account.
How to Deactivate Your Facebook Account?
In this section, we will discuss the different procedures for deactivating your Facebook account on an iPhone, Android device, and computer. Deactivating your account allows you to take a break from the platform without permanently deleting your information or connections. We will go through the steps for each device to help you deactivate your Facebook account whenever and wherever you need to.
How to Deactivate Facebook Account on Computer?
To deactivate your Facebook account on a computer:
Step 01: Click your profile picture in the top right corner of the Facebook page.
Step 02: Select Settings & privacy from the dropdown menu, then click “Settings.”
Step 03: Under the Privacy section, click Your Facebook information.
Step 04: Click Deactivation and deletion.
Step 05: Choose Deactivate Account, then click Continue to Account Deactivation. Follow the instructions to confirm the deactivation.
How to Deactivate Facebook Account on the iPhone or iPad?
To deactivate your Facebook account on an iPhone:
Step 01: Tap the menu icon in the bottom right of the main profile screen.
Step 02: Scroll down and tap Settings and privacy, then tap Settings.
Step 03: Tap Profile Access and Control.
Step 04: Tap Deactivation and deletion.
Step 05: Choose Deactivate Account and tap Continue to account deactivation. Follow the instructions to confirm the deactivation.
How to Deactivate Facebook Account on the Android FB App?
To deactivate your Facebook account on an Android device:
Step 01: Tap the menu icon in the top right of the app.
Step 02: Scroll down and tap Settings & privacy, then tap Settings.
Step 03: Tap Profile Access and Control.
Step 04: Tap Deactivation and deletion.
Step 05: Tap Deactivate Account, then tap Continue to Account Deactivation. Follow the instructions to confirm the deactivation.
That is all about how to deactivate Facebook account on different devices. Kindly note: if you decide to come back to Facebook after deactivating your account, you can easily reactivate it by logging in again or using your Facebook account to log in to another service. Keep in mind that you will need access to the email address or mobile number associated with your account in order to complete the reactivation process.
Wrapping Up
This covers the process of how to delete Facebook account as well as how to deactivate Facebook account. Permanently deleting your account will delete all of your profile information, photos, posts, and videos. Deactivating your account will hide your profile and information from other users, but they will not be deleted. You can choose the option that best suits your needs and circumstances.
I hope this guide has helped you understand how to delete or deactivate your Facebook account. Don’t forget to bookmark Path of EX for more Facebook-related queries, guides, tips, and tricks.