
Is your laptop battery not performing up to the mark? Does the battery feel like it’s dying out pretty fast? If this is the case, then it’s probably time to get the battery checked. And for that, we’ll be sharing a tutorial guide on how to check laptop battery health on Windows 10 PCs.
If your Windows 10 system runs out of juice even before its stipulated battery life, then the situation calls for a battery diagnosis. But don’t worry, you won’t have to go through the trouble of visiting the repair/replacement center just yet. You can potentially save yourself that trip by carrying out a battery health checkup from the comfort of your home.
With Windows 10 laptops, you can diagnose the health of your battery via the use of a great in-built feature. This tool, called Battery Report, can deliver you performance and usage analysis along with the battery life estimates in order to get a better understanding of the issue.
As its name suggests, you’ll get a full break-down report with the Battery Report feature. Read along with the article if you’re wondering how to check laptop battery health in Windows 10 systems and save yourself a trip to your local technician.
In This Article
Know-How to Check Laptop Battery Health on Windows 10 Using Battery Report
You can easily access the battery report tool through the command prompt window. Here’s what you have to do in order to generate a report
1. Run Command Prompt
The first step is to launch the command prompt window. Just click open the Start menu and type “Command Prompt” in the search box. The search results will show up fairly quickly as soon as you start typing.
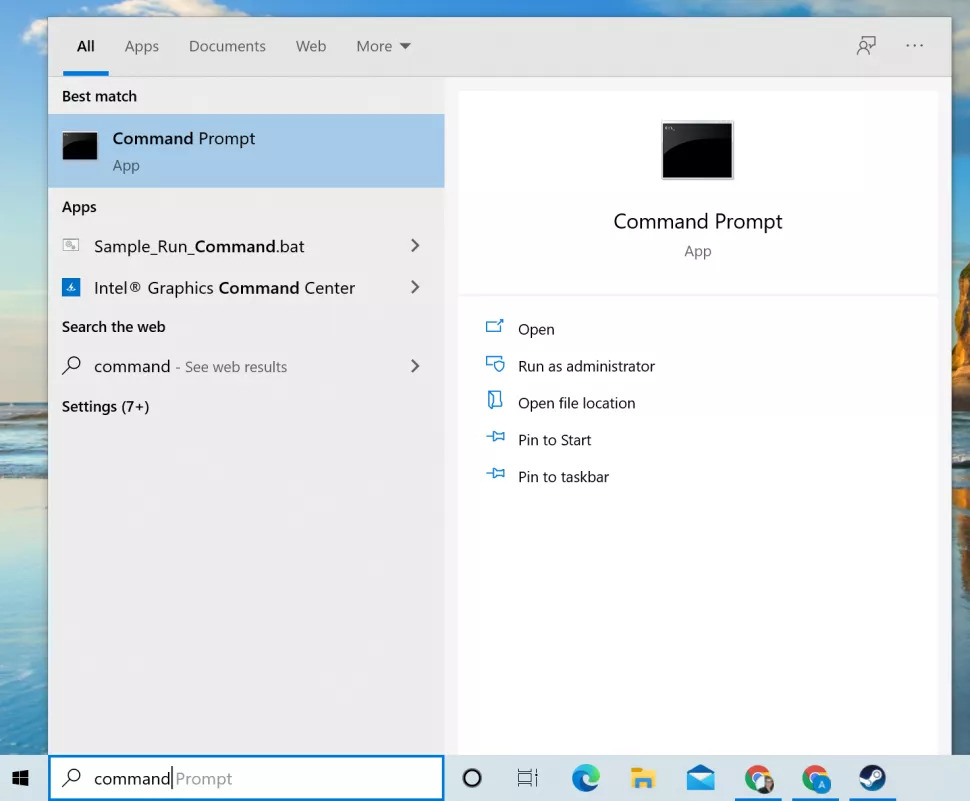
Alternatively, navigate and scroll down through the app list in the Start Menu to look for Command Prompt manually. Once you find it under the Windows System section, click it to open.
2. Type “powercfg /batteryreport” in the prompt window
Once the command prompt has opened, you’ll see some white command lines within a black window. This is where we need to type in our command line for Windows 10 to generate the battery report.
All you have to do is paste or type in the following command: “powercfg /batteryreport” after the “>” symbol in the prompt window and then hit Enter.
3. Look out for the “Battery Life report saved to…” prompt
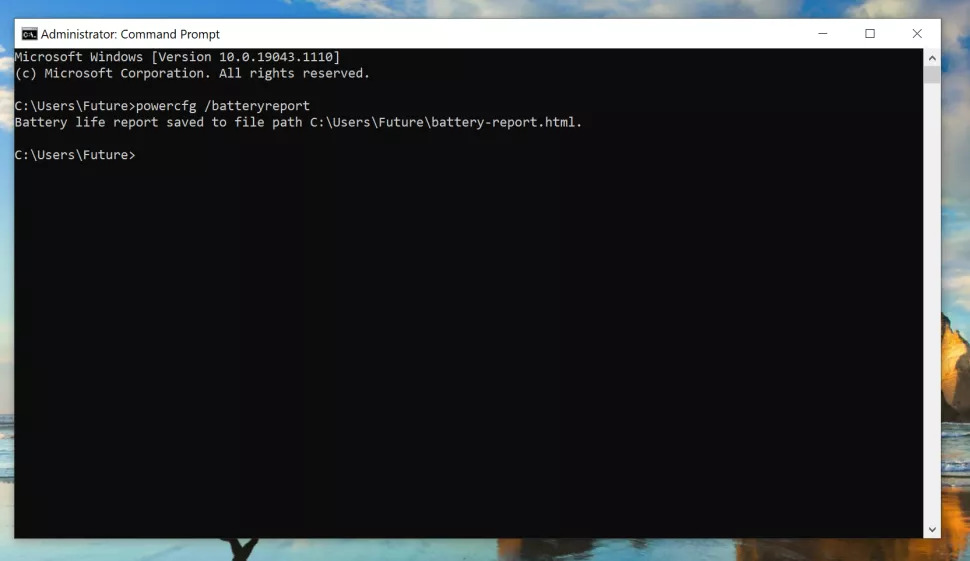
Provided everything worked out well in the previous step, you should be able to see a message response in the command prompt window itself. This message determines the location folder where the generated battery report has been saved to.
4. Locate the saved battery report
Once you navigate and browse to the location of the folder that the prompt window specified, you’ll find a battery report in the HTML document format.
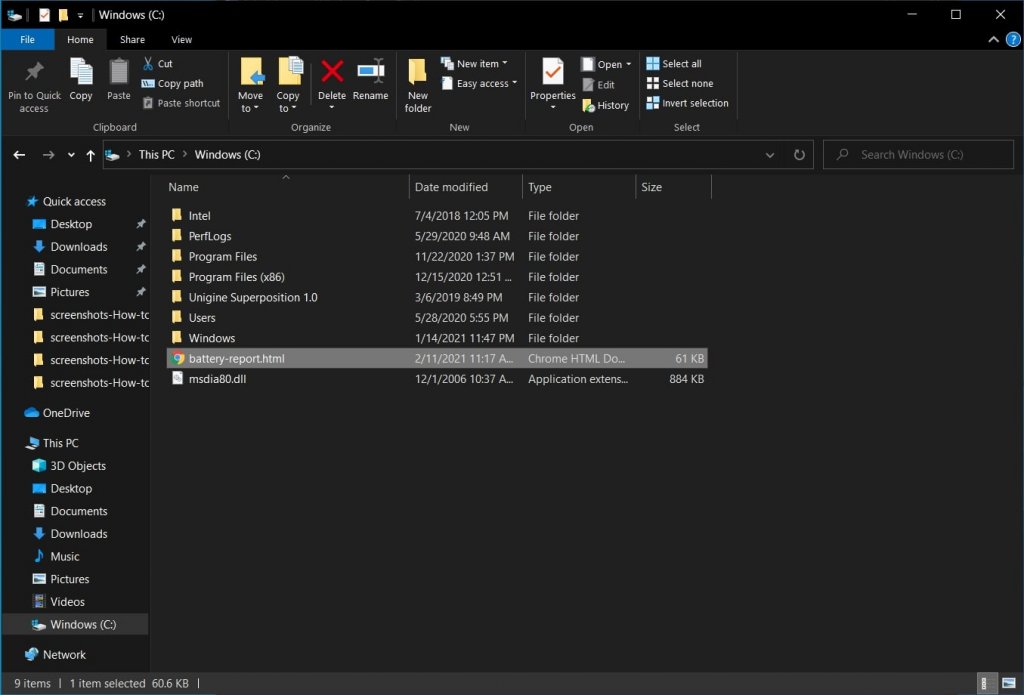
To do that, open File Explorer on your system and follow the path as instructed in the prompted message. Alternatively, you can also search for the report by simply typing in ‘battery report’ into the Start Menu search box.
5. Open the report
As previously mentioned, the report saved is in an HTML document format. So clicking it to open will launch your default-set browser and open the HTML file.
The battery report is a detailed file with information ranging from your laptop’s battery usage to battery life estimates. If you want to know more about the battery report, head on over to the next section.
What Does the Battery Report Include?
Once you open the battery report file, you’ll be presented with a list of information outlining the battery’s health. From your system’s basic information and the specifications of the battery to the analysis of its performance, you can get pretty much every detail and insight into your laptop’s battery condition.
Following the report, there’ll be a lot of sections. Let’s try to cover them one by one.
Recent Usage: This section covers the power status of your battery over the last three days. The Recent usage will mention every timing that the laptop ran on a battery and also the times when the laptop was connected to an active AC source over the period of the last three days.
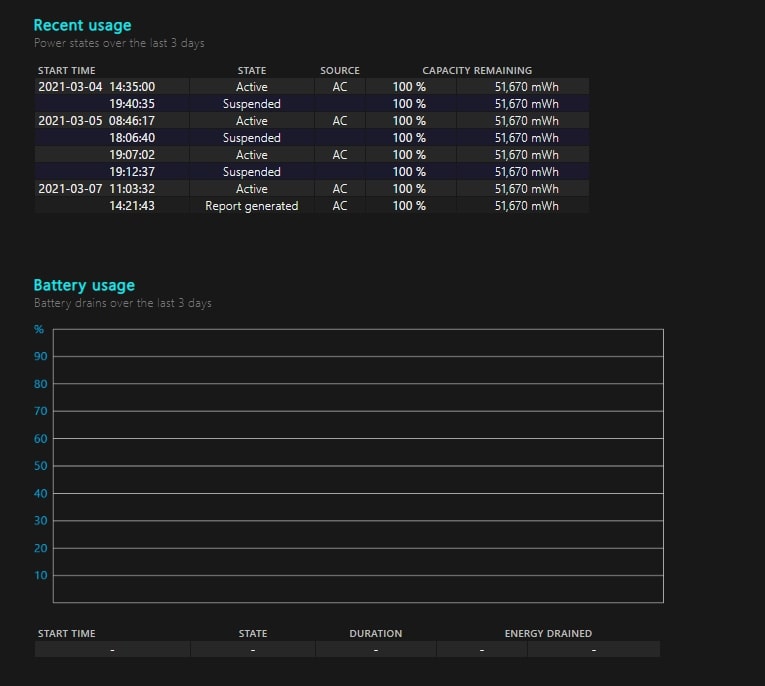
Battery Usage: The Battery usage section mentions and tracks every drainage of the laptop battery in the past three days.
Usage History: As clear by its name, this section gives a full history of the usage of your laptop battery.
Battery Capacity History: This section covers the over-the-time change in the capacity of the battery. There are three columns, namely Period, Full Charge Capacity, and Design Capacity.
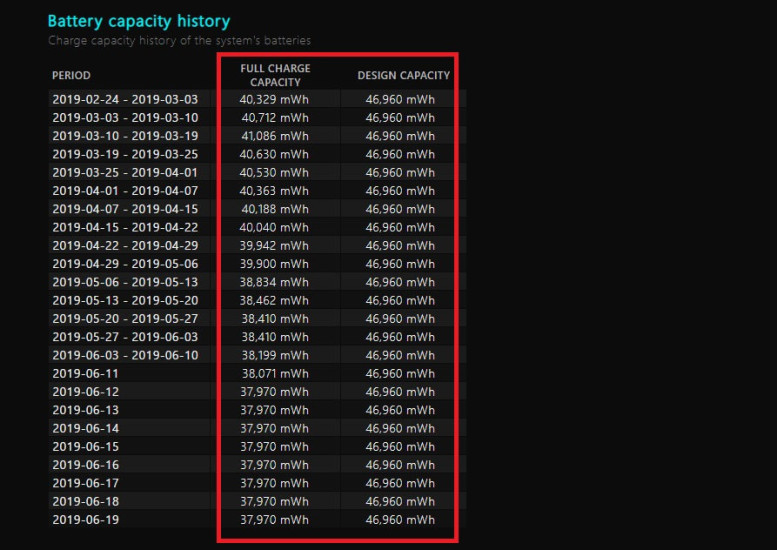
While Design Capacity refers to the capacity that the battery was designed to handle, the Full Charge Capacity displays the current battery capacity, which generally shows a gradual decline owing to its overtime use.
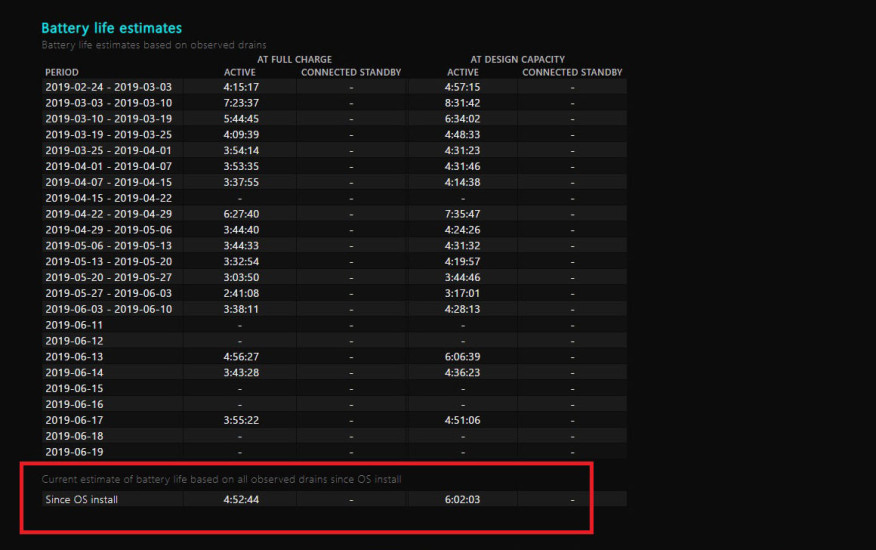
Battery Life Estimate: Based on Design capacity, this section gives a comparison of how long the battery should last vs. how long it actually lasts. At the bottom of the report, there’s an ‘OS Install’ entry which is related to the battery life estimation after OS install.
Wrapping Up
This brings us to the end of our article on how to check laptop battery health on Windows 10. We hope that the guide provided was easy enough for you to understand and follow through. If you liked the article, give it a share among your friends.
Comment down below your thoughts about the article. And for more such interesting content related to Technology, Entertainment and Lifestyle, keep visiting Path of Ex – Your Spot For Trending Stuff!
Feature Image Credit: YouTube