
Transforming your computer’s DNS Server settings can improve your search engine privacy, safety, and surfing performance. For parents, altering the setting of the DNS server will also stop their children from viewing any potentially harmful information. Furthermore, altering your DNS enables users to access otherwise unavailable things in your location. Here, you are going to learn How to change your DNS Server on Windows 10.
Whenever you sign up for an internet connection for your house or company, your Internet Service Provider (ISP) will also offer you the essential network settings, such as DNS (Domain Name System) addresses. This will allow you to easily surf online websites, do work from home, and download a large amount of content directly onto your system. However, the drawback is that the DNS servers provided by the ISP are typically unreliable, unstable, and, of course, have no privacy.
If you want to change your DNS server on Windows 10, read this article thoroughly to learn about all of the options. So that you don’t have to browse anymore on Google, I have framed solutions in a simplified manner.
In This Article
3 Simple Methods on How to Change Your DNS Server on Windows 10

All of you are aware that DNS servers are important. The “Domain Name System” refers to the URLs you enter on your web page. Most of us assume that the DNS performs a simple role like entering the website’s title and getting you to the desired location.
However, you must know that a Domain Name System server converts the URL you enter into an IP address that your device can recognize. The quicker this procedure is completed, the lesser delay will be, and the browser will fetch web pages for you more quickly. For this, you can alter the DNS settings on your desktop. To know more about it, follow the subheadings below.
How to Change Your DNS Server on Windows 10 in Control Panel?

The easiest method to change your DNS server on Windows 10 in the control panel can solve all your problems once and for all. If you want to know how to change your DNS server on Windows 10, go through the steps below-
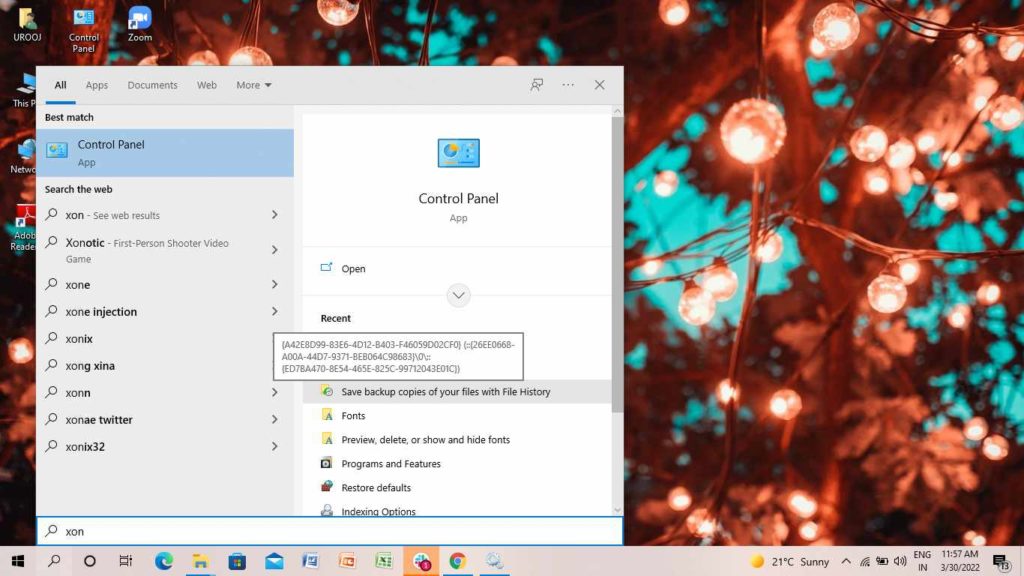
- Go to the Windows icon (Start Menu) on the left side of the screen.

2. On the Search bar, enter the Control Panel or press Windows key+S.
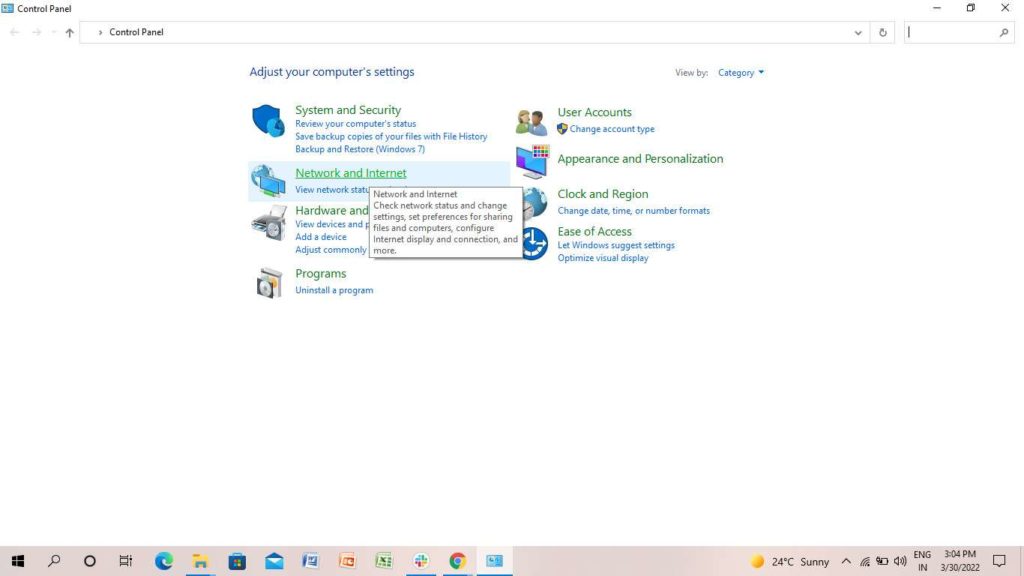
3. Click on Network and Internet.
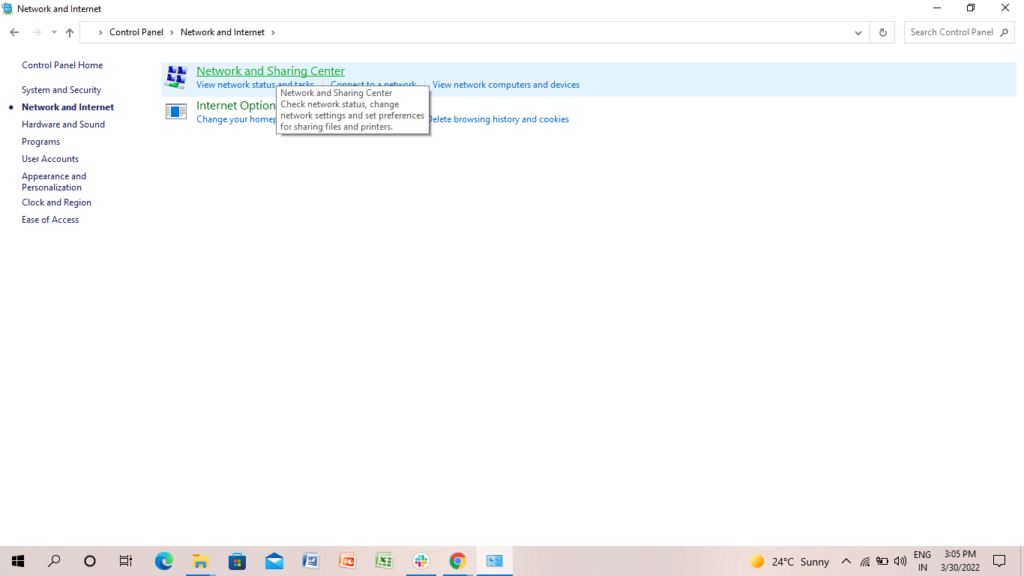
4. Click on Network and Sharing Center.
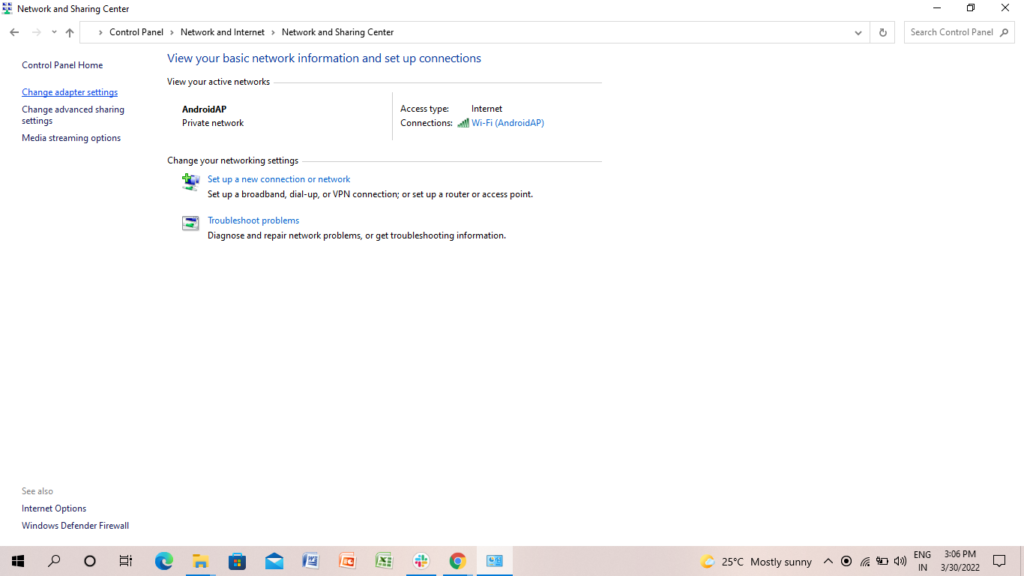
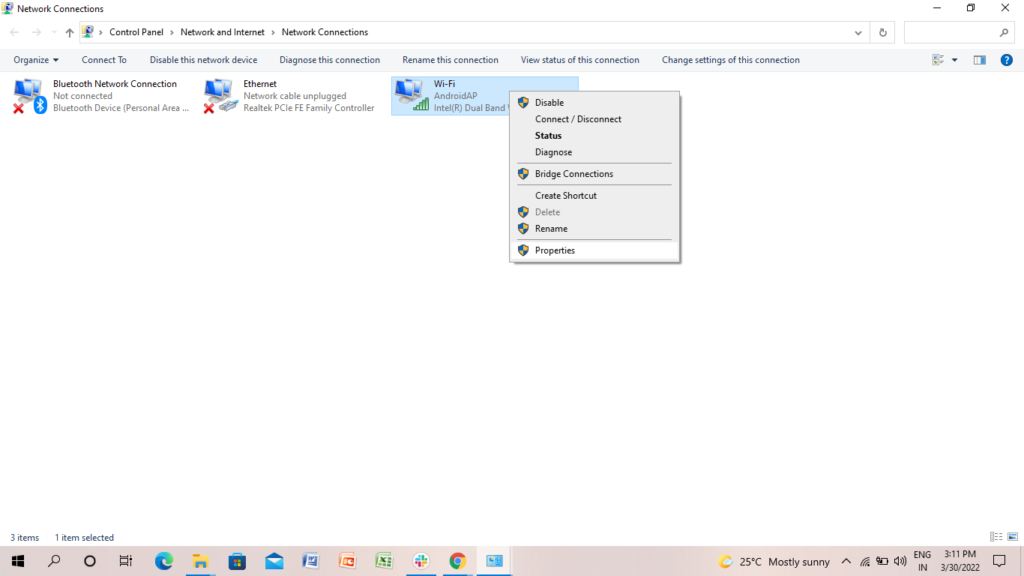
5. Click on Change Adapter Settings.
6. Right, click on the Network you use.
7. Click on Properties.
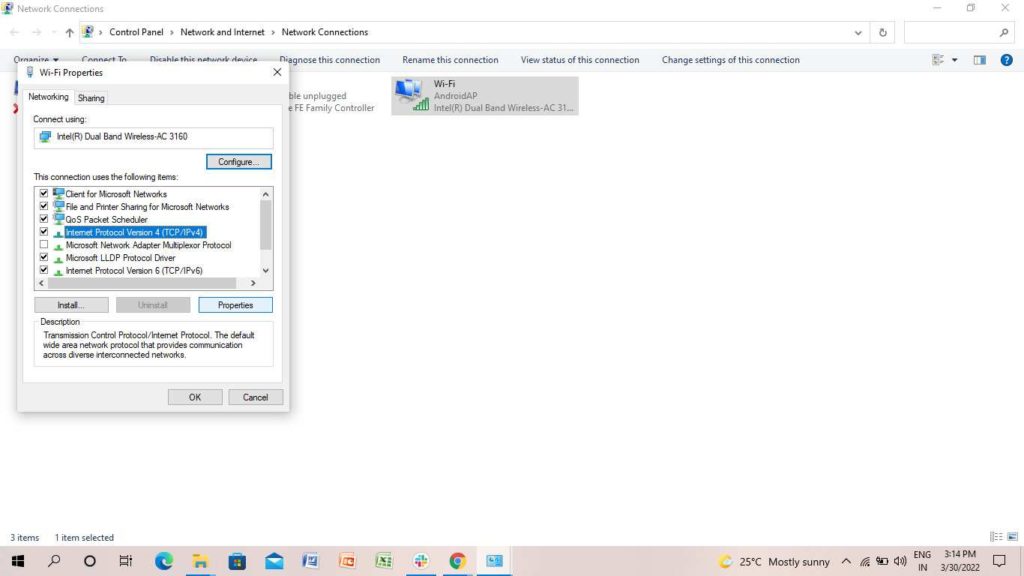
8. Tap on Internet Protocol Version 4 (TCP/IPv4).

9. Tap on Properties.
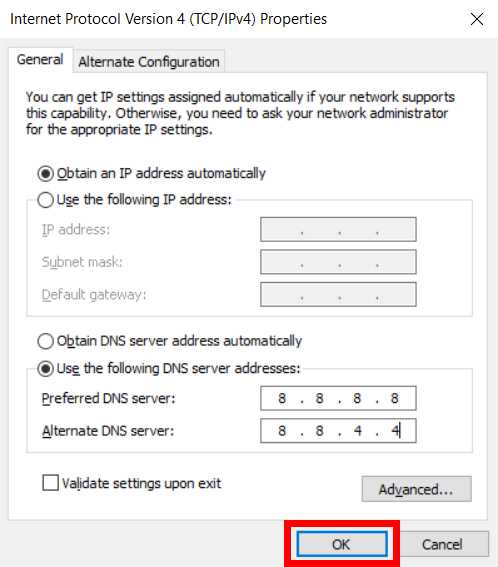
10. Use the following DNS servers.
11. Enter the address number in the Preferred and Alternate DNS server.
12. Once you are done, tap on Ok.
Note:- You can also check your DNS number on What’s My DNS Server.
How to Change Your DNS Server on Windows 10 in Settings?
Another option to know how to change your DNS server on Windows 10 in Settings is super easy. To know how to do it, follow the steps below-
- Go to the Windows icon (Start Menu) on the left side of the screen.
Or
Press Windows key+I

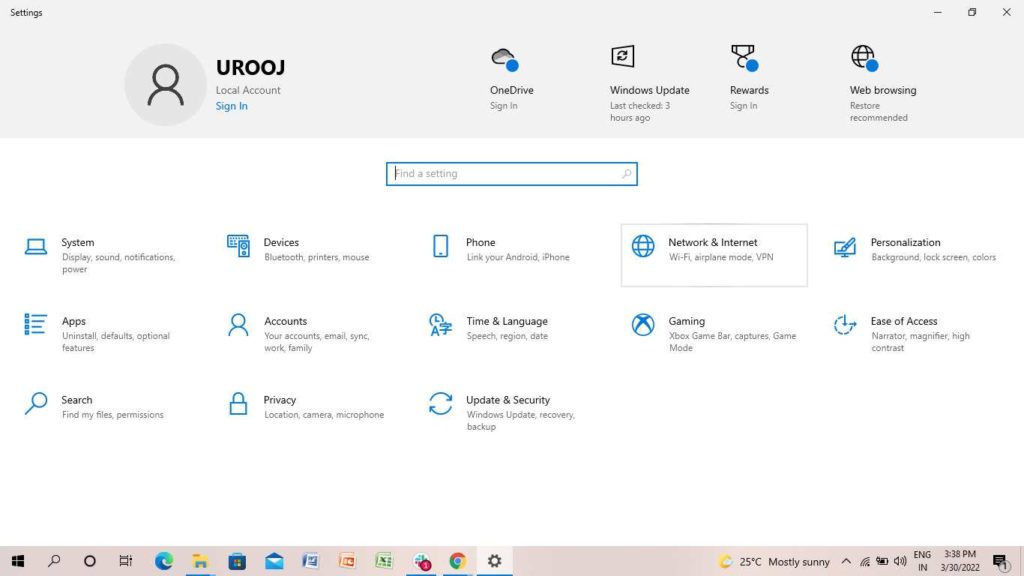
2. Click on Settings.
3. Click on Network and Internet.
4. Click on Wifi.
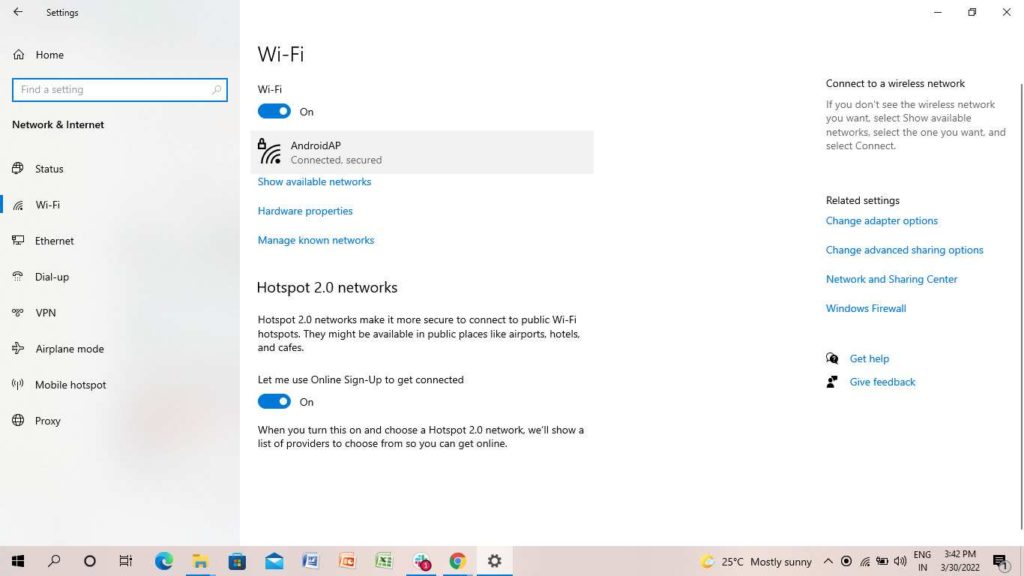
If you are using an Ethernet, you can click on it.
5. Click on the Network which you are using. Here, I am clicking on Wifi.
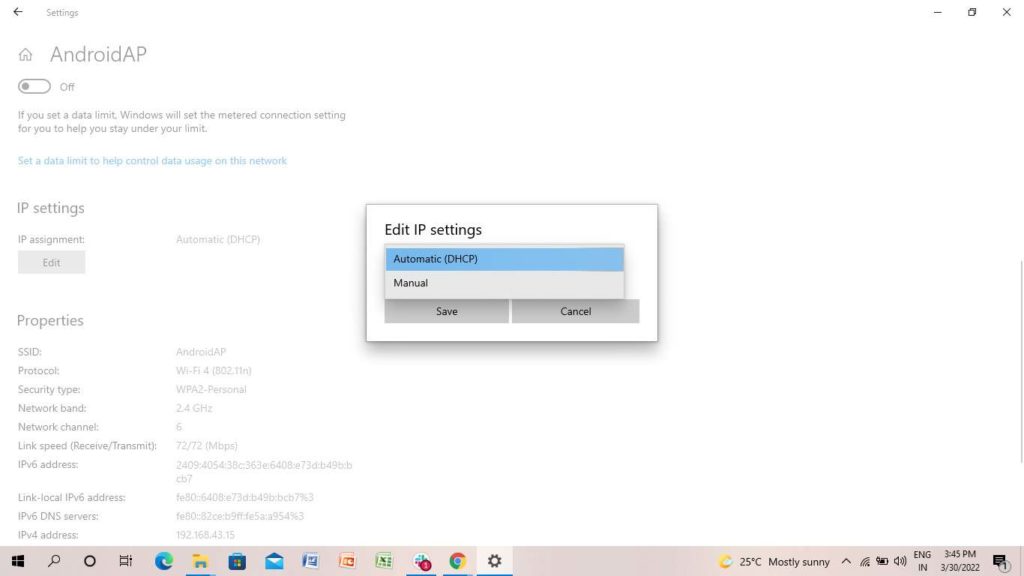
6. Under IP Settings, click on Edit.

7. In the drop-down menu, click on Manual.
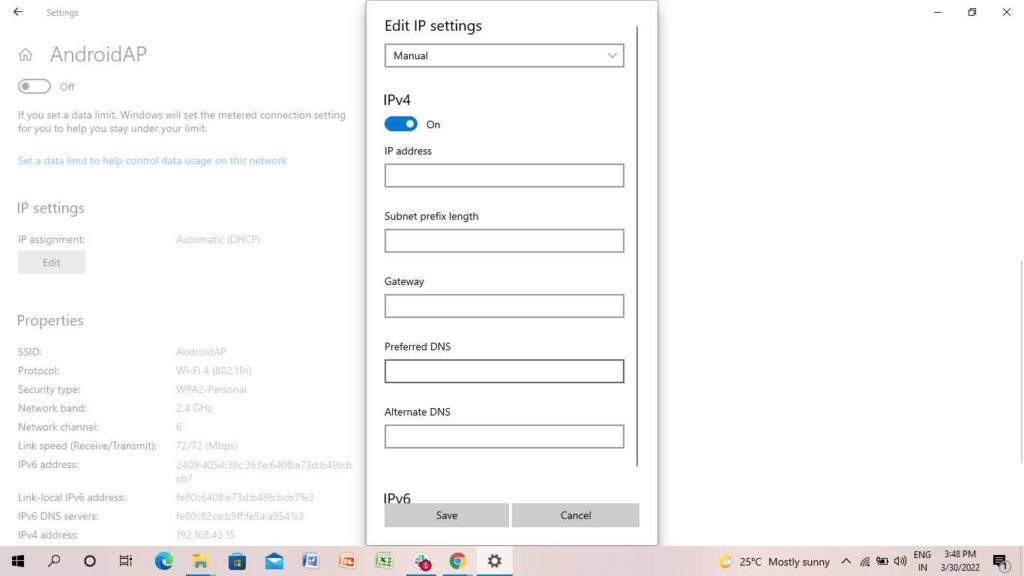
8. On the next page, turn IPv4 on.
9. Enter Preferred and Alternate DNS.
10. Click on Save.
How to Change Your DNS Server on Windows 10 in Command Prompt?
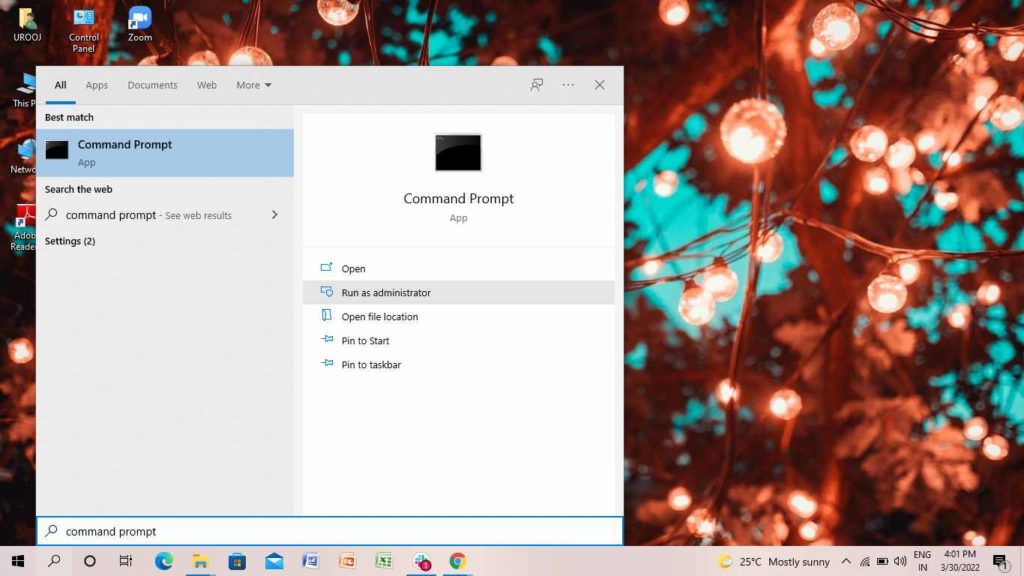
If you want to know how to change your DNS server on Windows 10 in Command Prompt, follow the steps below-
- Go to the Windows icon (Start Menu) on the left side of the screen.

2. On the Search bar, enter Command Prompt.

3. Tap on Run as administrator.
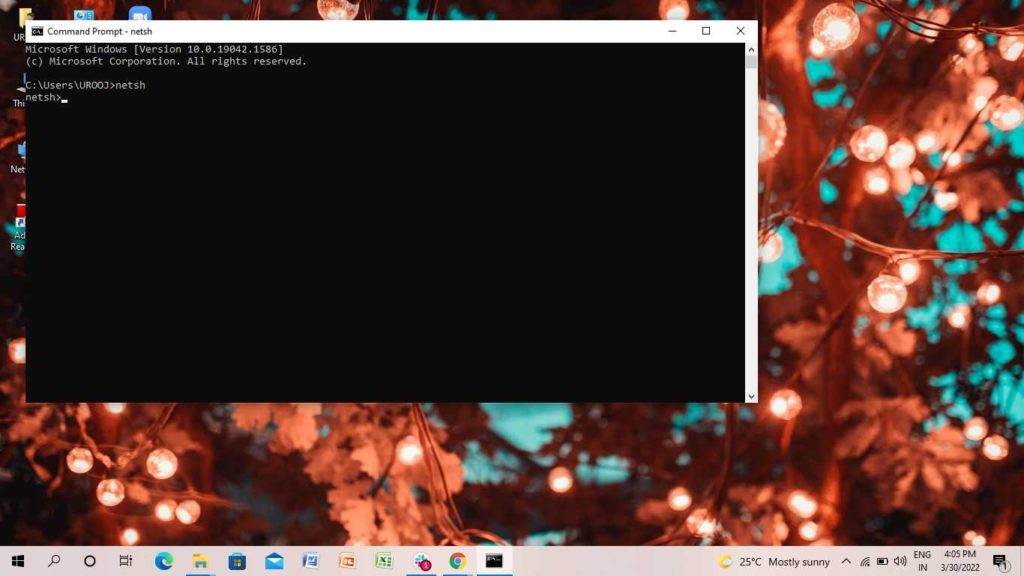
4. Type netsh.
5. Press Enter key.
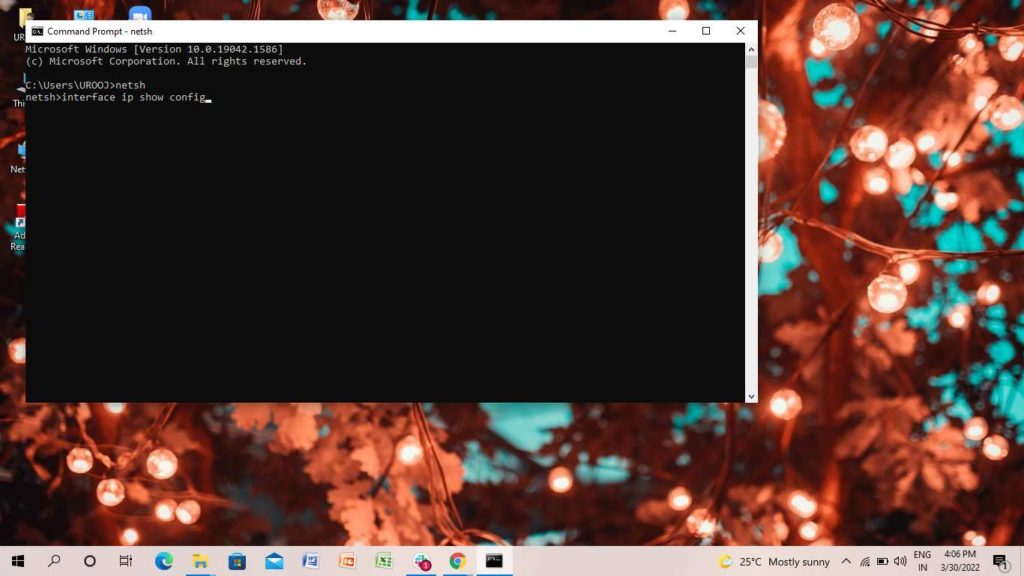
6. On the next page, at netsh> enter interface ip show config.
7. Click Enter.
8. Navigate through the options and search for your network.

9. At netsh > enter interface ip set dns name=”ADAPTER-NAME” source=”static” address=”X.X.X.X”
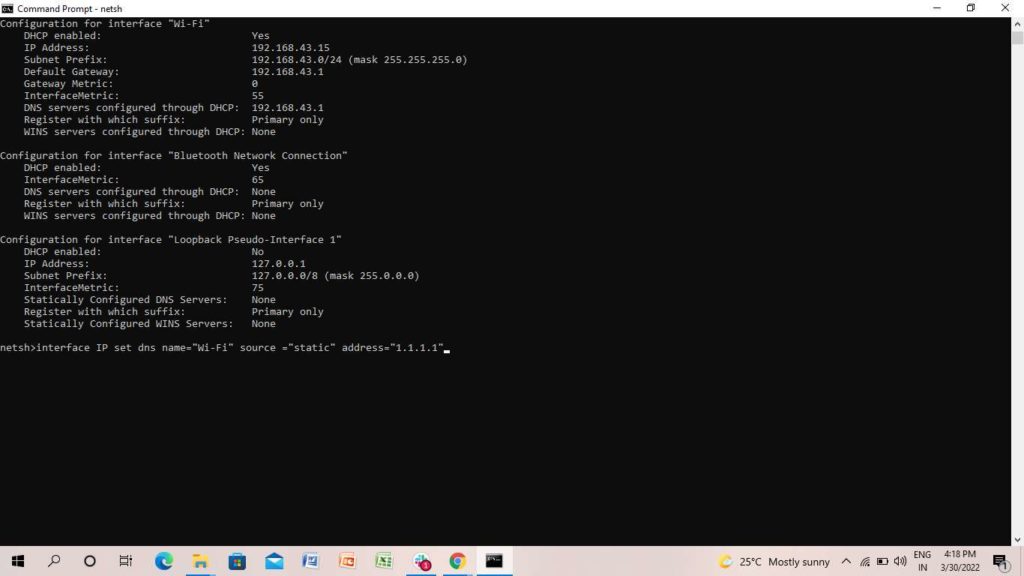
If you want to add the alternative DNS server number, you can do that easily, only you have to change the DNS name and the address number. Below, I have given the example of Primary DNS addresses and alternative DNS addresses.
- interface ip set dns name=”Wifi” source=”static” address=”1.1.1.1″
- interface ip add dns name=”Wifi” addr=”1.0.0.1″ index=2
- interface ip add dns name=”Wifi” addr=”8.8.8.8″ index=3
I hope the above three methods helped you to know how to change your DNS server on Windows 10.
Wrapping Up
I hope this article was useful to you. So what are you waiting for? Start applying these steps and change your DNS server on Windows 10. Feel free to share the article with your friends and let them know how to change your DNS server on Windows 10. Now, it is time for a wrap-up. Stay tuned for all the updates.
Frequently Asked Questions
Can I use 8.8.8.8 DNS?
Yes, anyone can use 8.8.8.8 DNS. All you need is an internet connection. 8.8.8.8 is the primary DNS address and 8.8.4.4 is the secondary DNS.
Is it ok to change the DNS server?
Yes, it is safe and secure if you want to change the DNS server.
Which is the fastest DNS server?
Cloudflare built 1.1.1.1 is the fastest DNS server.